

35 Stunning Small Kitchen Makeovers Under $1000
Renovating my small kitchen on a budget was one of the most rewarding projects I’ve ever taken on.
At first, I thought a remodel would cost tens of thousands of dollars.
But once I started researching what other homeowners were doing—and trying a few upgrades myself—I realized that you can transform a kitchen for under $1,000 if you focus on the right changes.
In fact, a recent Houzz Kitchen Trends study shows that 81% of homeowners still change their kitchen’s style, even when working with limited budgets, and traditional and transitional looks are on the rise.
This guide brings together 35 of those ideas, including ones I tried myself, so you can refresh your own space without the stress of a full remodel.
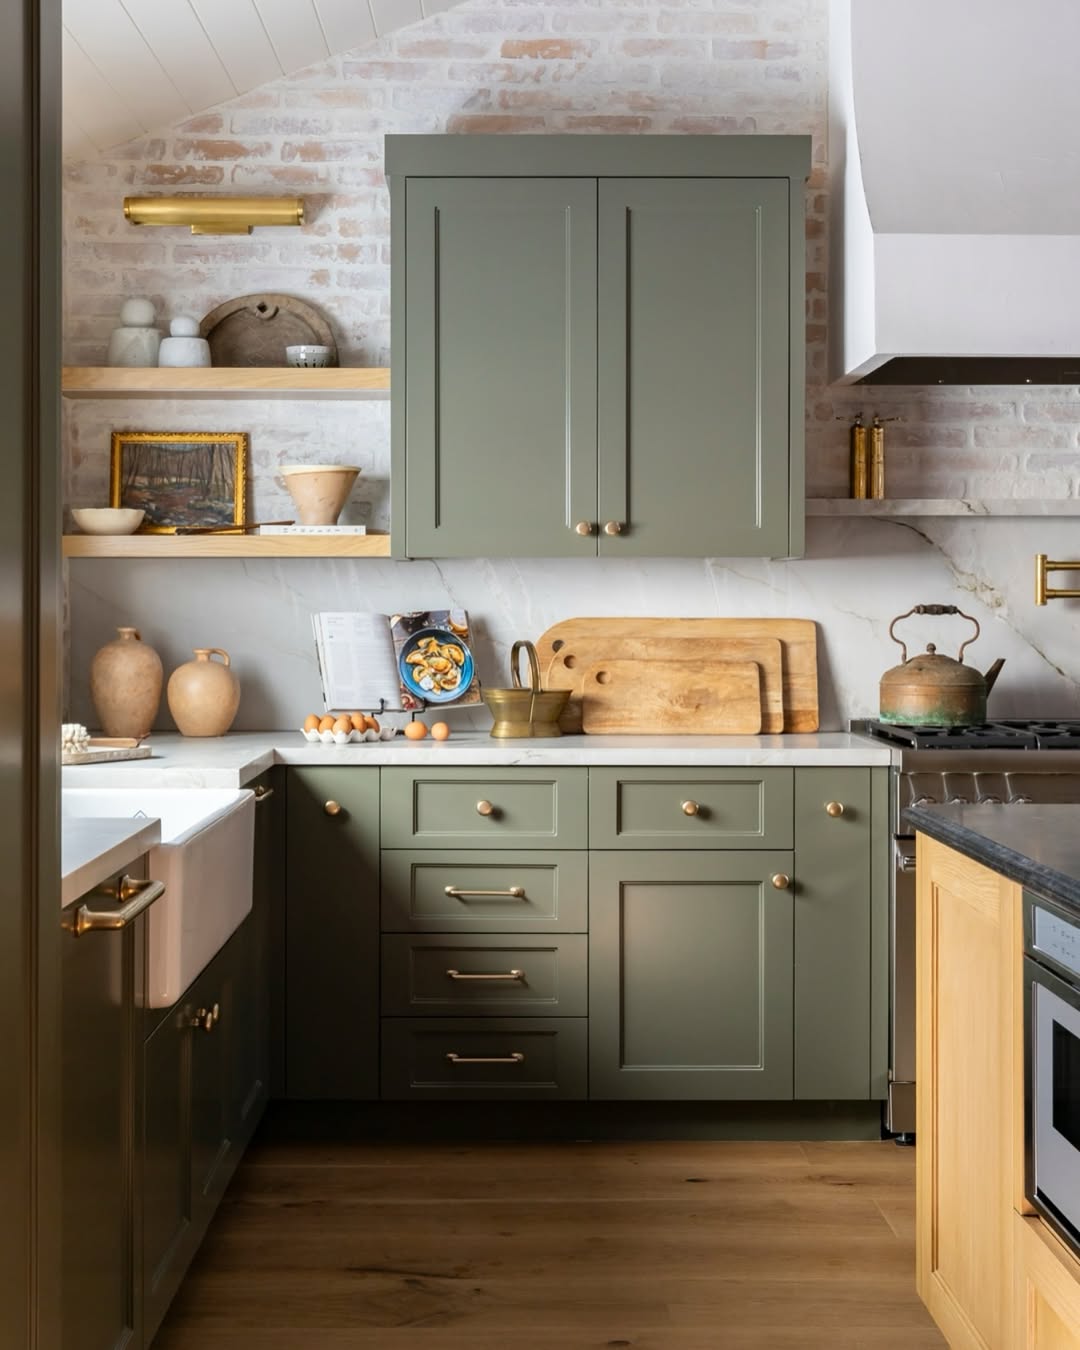
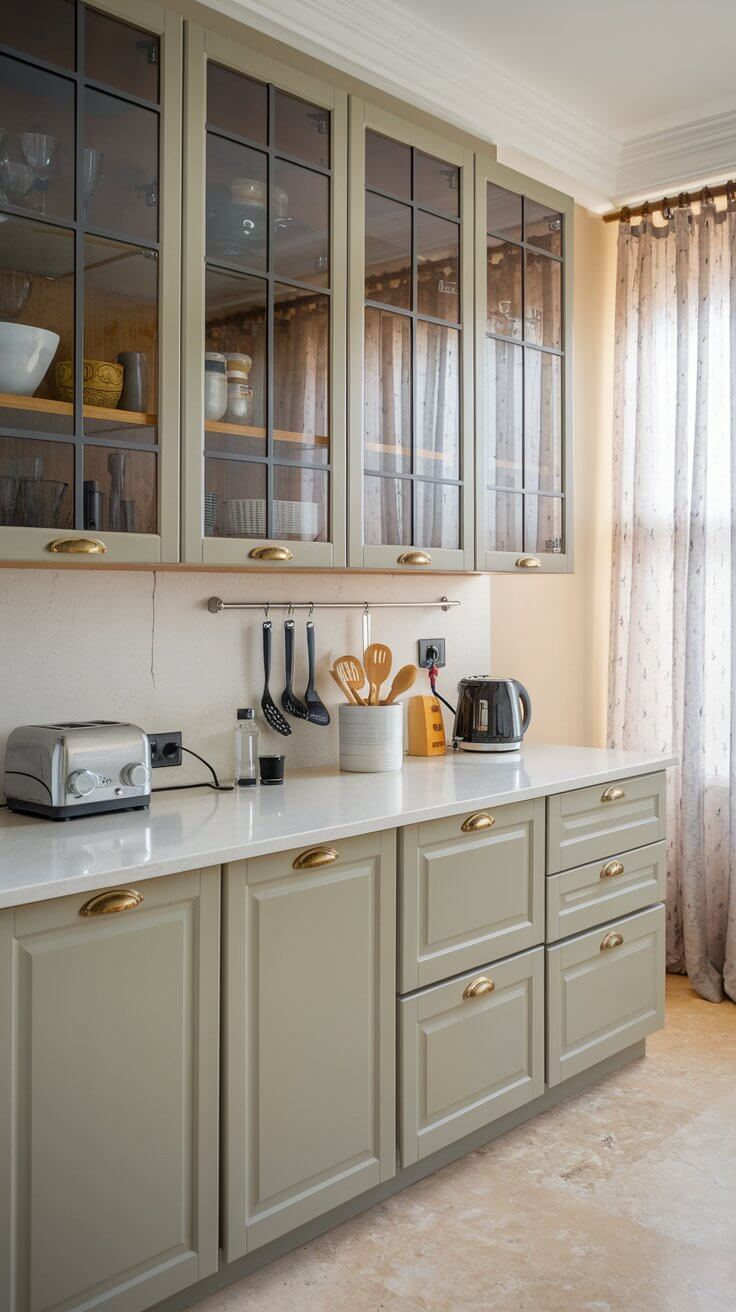
1. Paint Your Cabinets – DIY: $200–$600 (Pro: $425–$1,450)

Painting is hands-down the most rewarding budget makeover.
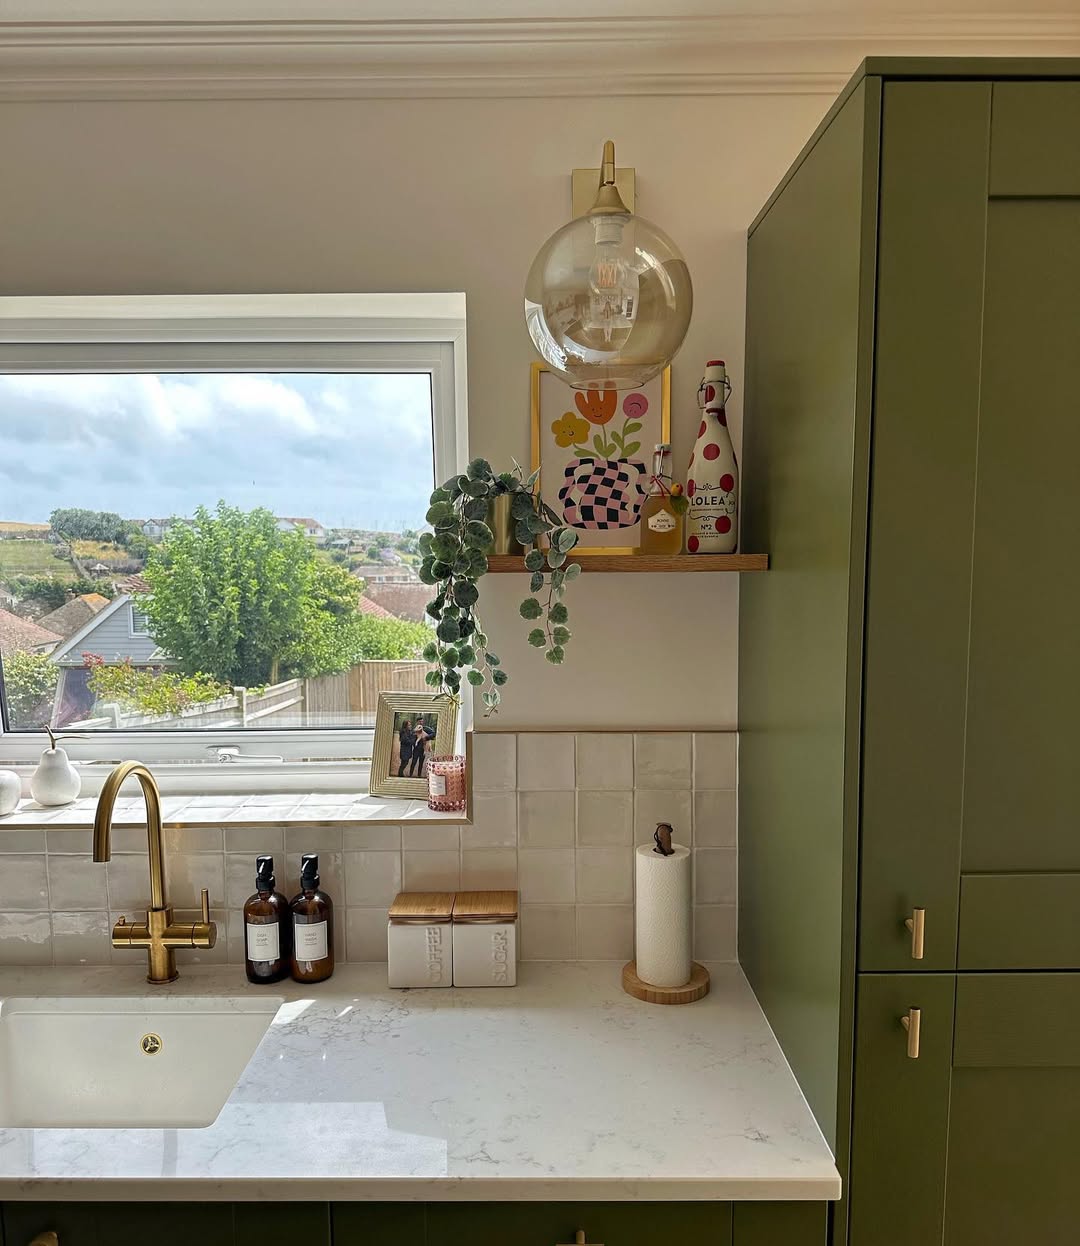
I refreshed my cabinets with soft sage green paint and noticed my kitchen looked calmer, fresher, and larger—all in just a weekend.
Why this works: According to The Spruce, painting costs between $3–$10 per sq. ft., averaging around $919 total for a pro job, with the DIY version clocking in at just $200–$600 for materials. Compare that with $4,300–$10,000 for cabinet refacing or a full replacement.
How to tackle it with confidence:
- Remove all doors, label them, and take off the hardware.
- Lightly sand surfaces and apply a primer.
- Use a sprayer for a factory-finish vibe, or a smooth foam roller for DIY ease.
- Let each coat cure fully before reassembling.
Pro tip: A quality primer is your secret weapon. It guarantees durability so your paint lasts—and saves through wear-and-tear.
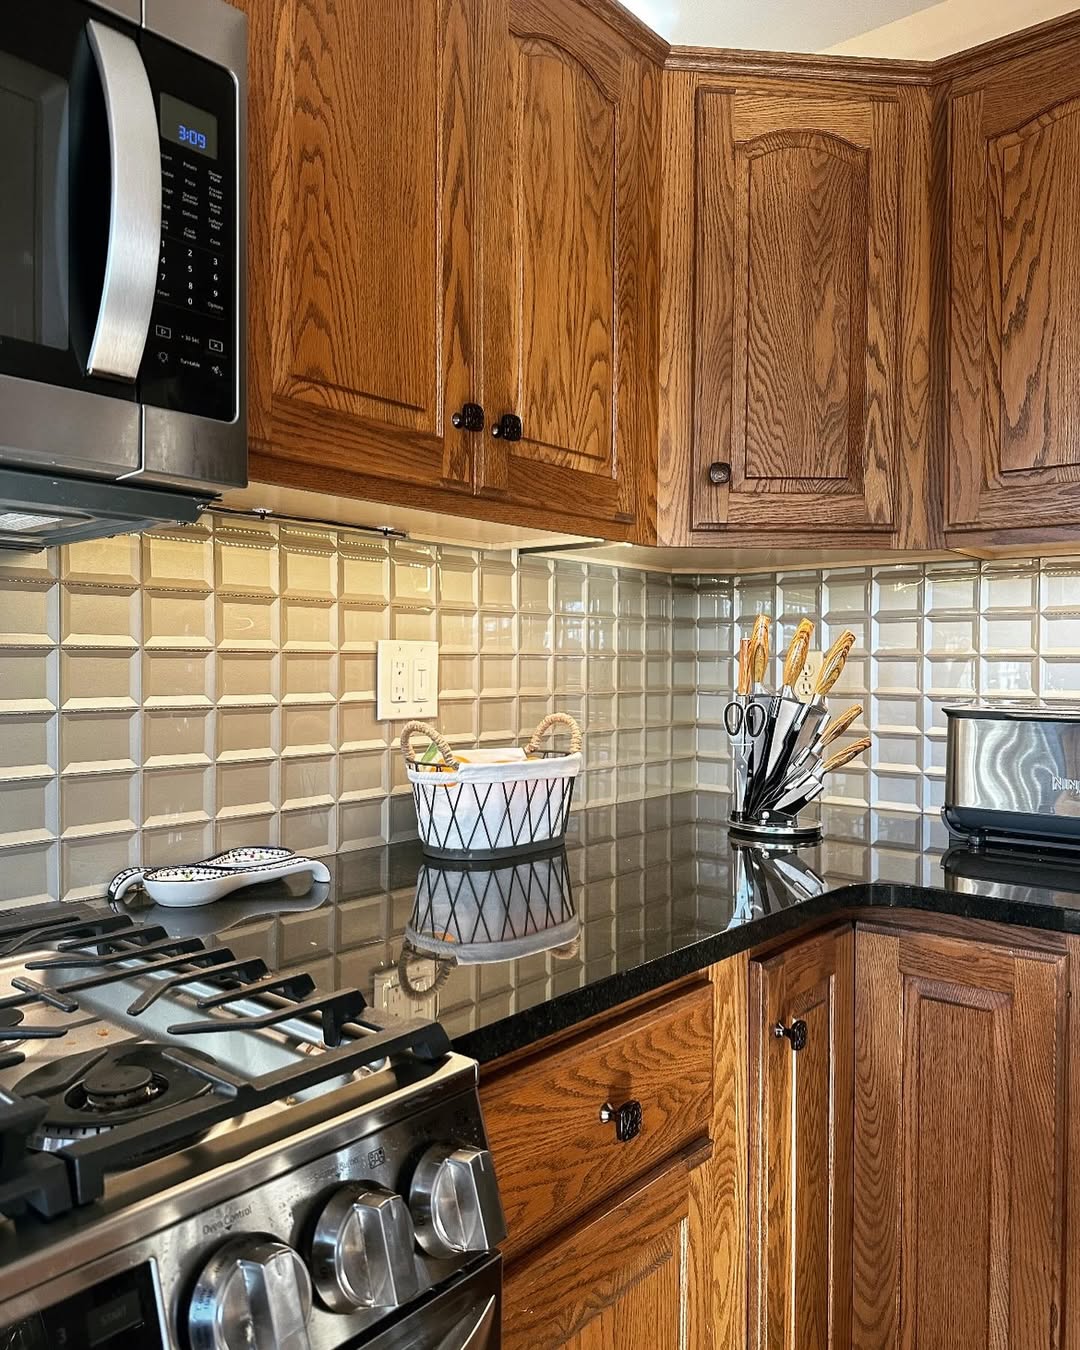
2. Add Peel-and-Stick Backsplash – $50-$150
Looking for an instant transformation that feels upscale? This is your go-to.
I installed subway-tile-style peel-and-stick backsplash for about $65 and saw an immediate lift in brightness and style—no grout, no mess.
Why this works: According to Bob Vila, peel-and-stick backsplashes start at $4 per sq. ft. and install in no time—even renters can undo them later.
Designer cautions? Avoid placing them next to direct heat sources—they can warp over time.
DIY approach:
- Clean walls thoroughly and ensure they’re smooth.
- Measure and cut carefully, using spacers for alignment.
- Press firmly to adhere, then seal edges with clear silicone for longevity.
Pro tip: Place peel-and-stick designs in high-visibility areas like behind the stove or sink for maximum impact with minimal effort.
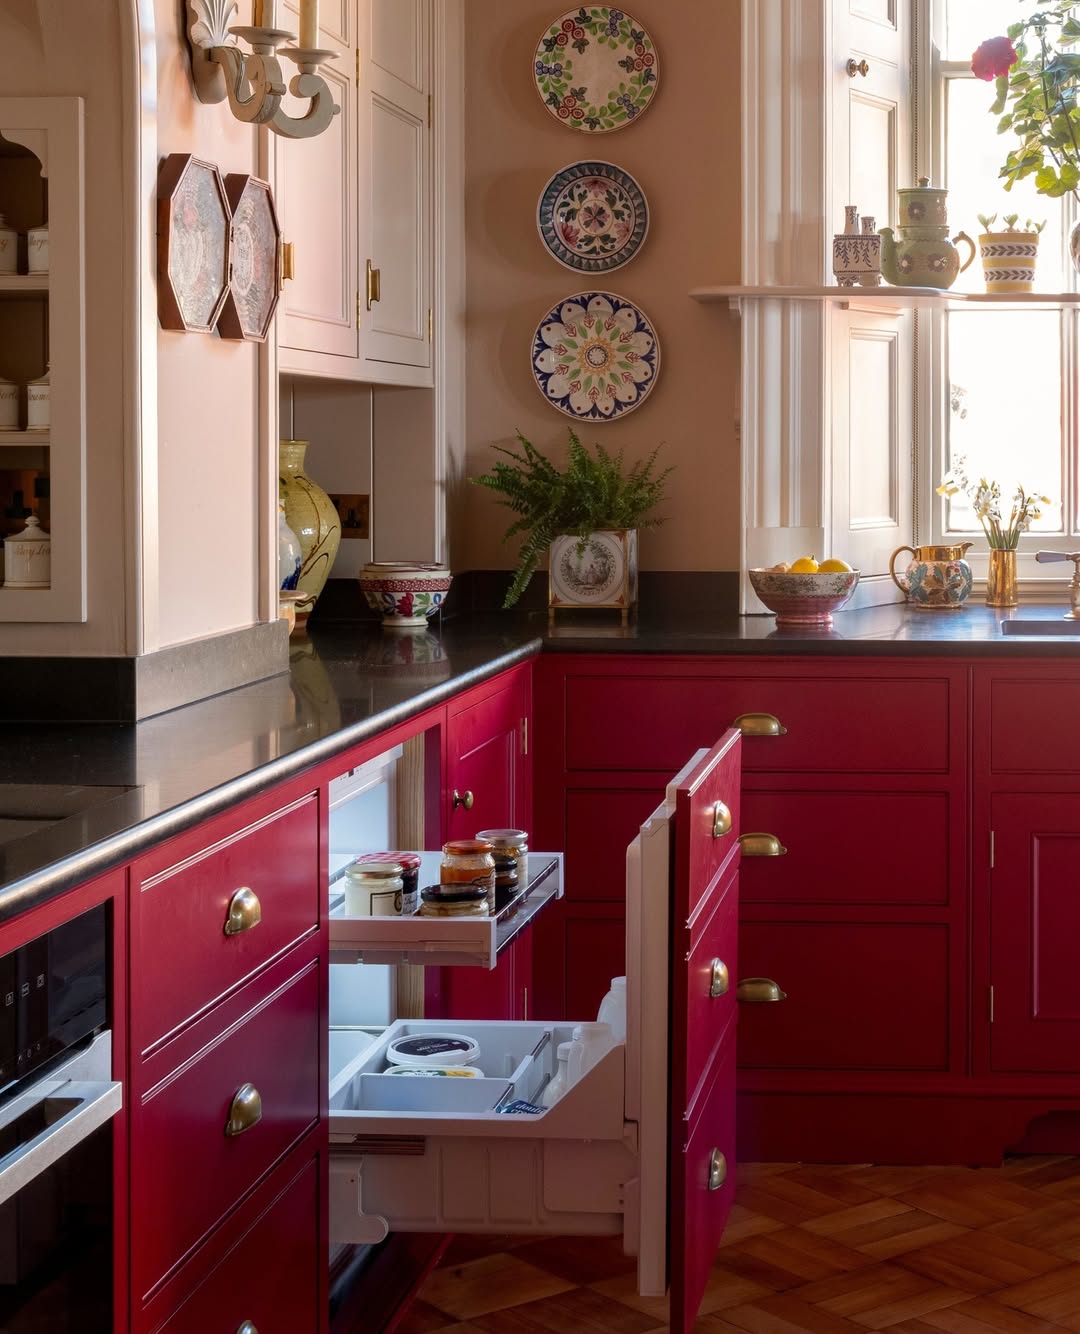
3. Swap Out Cabinet Hardware – $50-$150
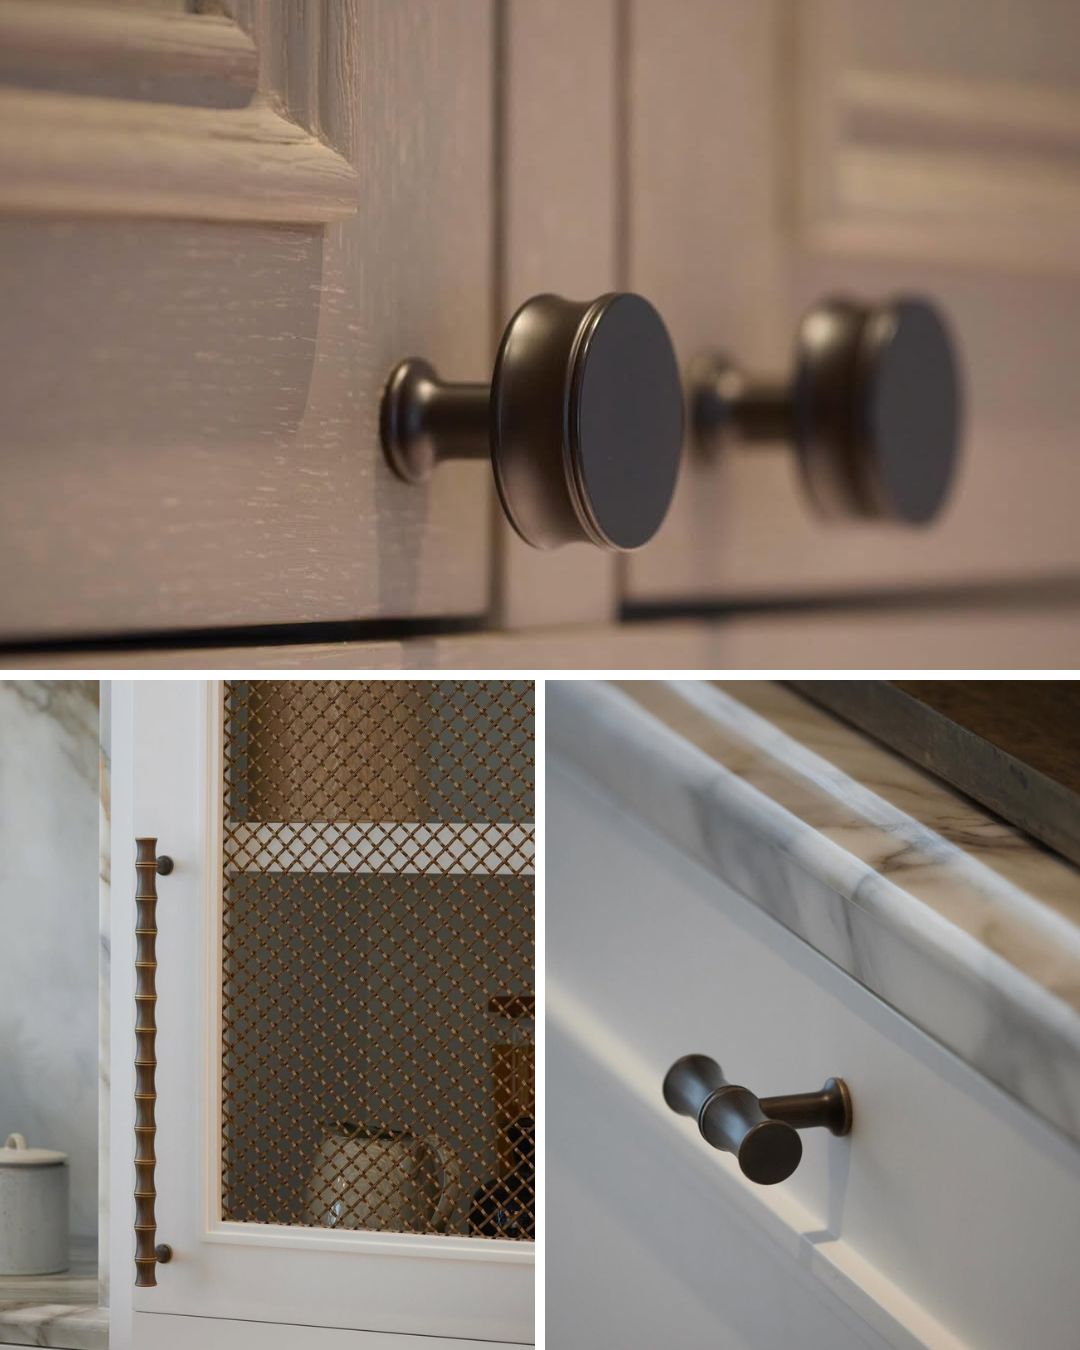
This is your detail that dresses the whole room.
I swapped out my builder-grade knobs for sleek brushed nickel pulls and spent just about $75. The difference? Instantly elevated and polished.
Average prices range from $2 to $20 per handle, so for a 30-piece kitchen, you’ll spend about $60 to $150,
Why hardware matters: According to interior designers quoted in Business Insider, simple changes like updated handles can significantly affect how high-end your kitchen looks. Brushed chrome and brass finishes are particularly effective in boosting polish,
Step-by-step:
- Measure hole spacing before buying new pulls.
- Remove old hardware and patch any scratches.
- Use a level to ensure pulls align across doors and drawers.
- Install and tighten delicately—not too tight to avoid stripping.
Pro tip: Order an extra few pulls—keeps things looking consistent if one gets damaged or lost later.
4. Install Under-Cabinet Lighting – $20-$250
Bringing light under your upper cabinets instantly transforms the kitchen’s mood and usability.
When I added battery-powered LED bars to my own setup—just $25 for a two-pack with adhesive strips—the prep area glowed warmly during evening cooking sessions. It’s one of those small upgrades that feels luxurious in a compact space.
Why it works: Lighting under cabinets not only makes cooking tasks safer, but it also adds depth and polish.
Total installation (materials and labor) should average $230–$300 per fixture, around $265 on average. Meanwhile, simpler battery- or plug-in kits run under $50 per fixture, letting you DIY with no electrician needed.
How to DIY it:
Watch the YouTube video below to see how easy it is:
Pro tip: I recommend motion-activated or dimmable models—they stay bright when you need them and conserve power when you don’t.
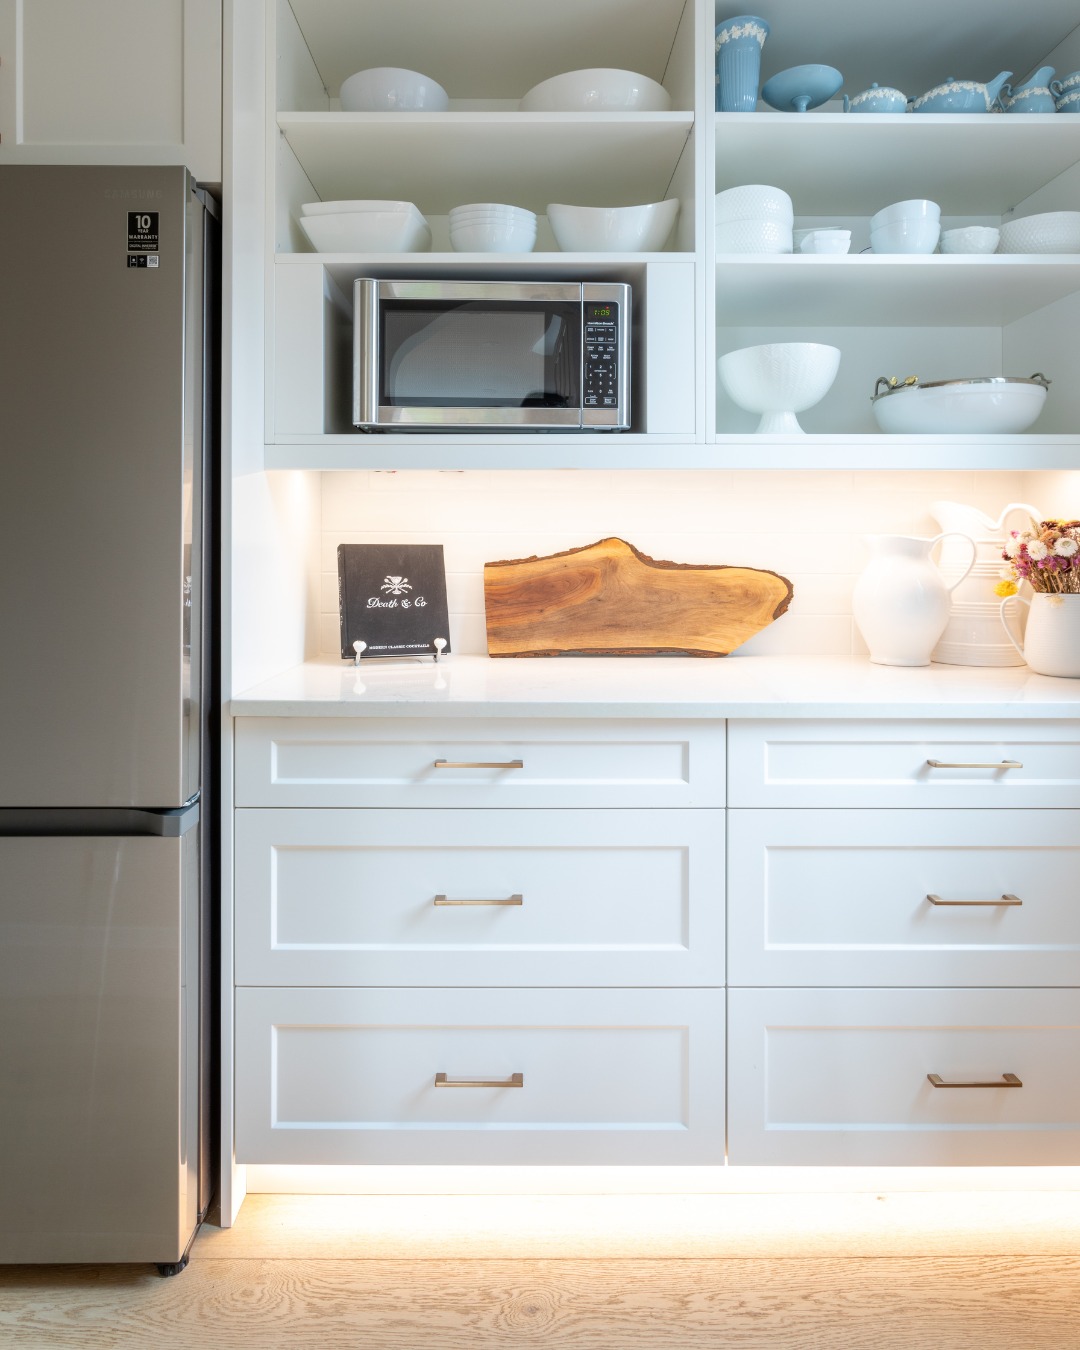
5. DIY Open Shelving – $60–$120
Open shelving was a game-changer in my kitchen. Swapping a pair of upper cabinets for a couple of floating shelves cost me about $80 total, and suddenly my kitchen felt twice the size.
Why it works: Open shelves make the space feel more open, showcase your dishware, and let you maximize vertical storage. Southern Living says open shelving projects can start as low as $60 total, depending on materials.
One DIY blogger built four farmhouse-style shelves for just $120 total.
How to execute:
- Remove the desired upper cabinets and patch the wall behind.
- Use sturdy brackets or hidden supports.
- Choose durable wood (pine, reclaimed boards) and finish it to match your decor.
- Secure shelves with wall anchors—strong enough to hold plates and prep tools.
Pro tip: Keep styling simple—stack your prettiest plates, jars, and mugs to make your kitchen look curated and spacious.
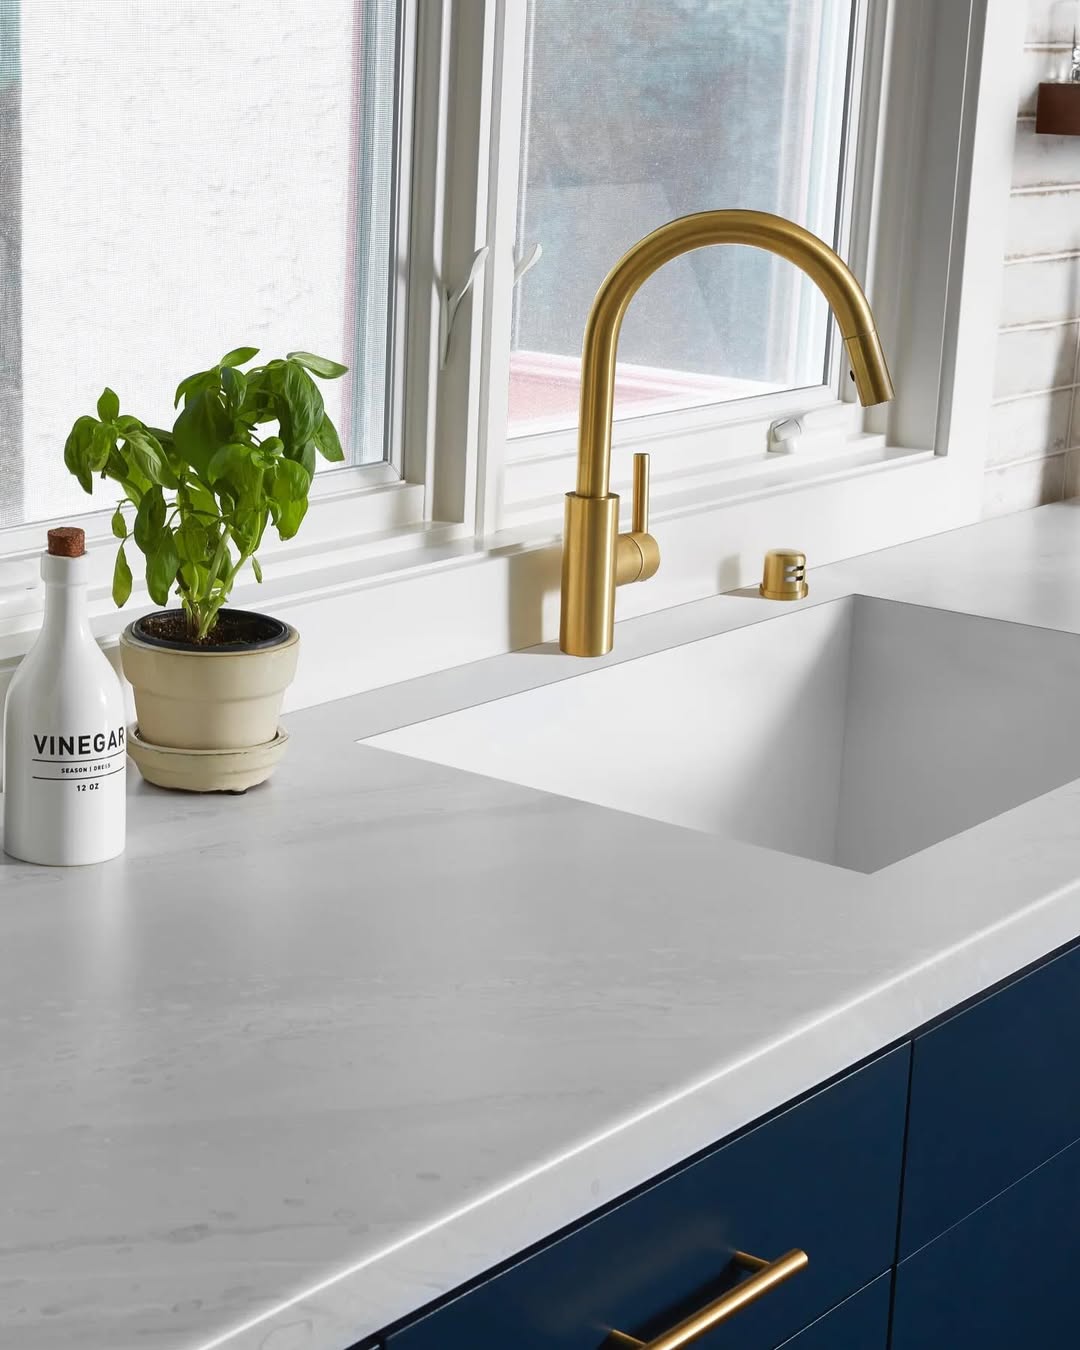
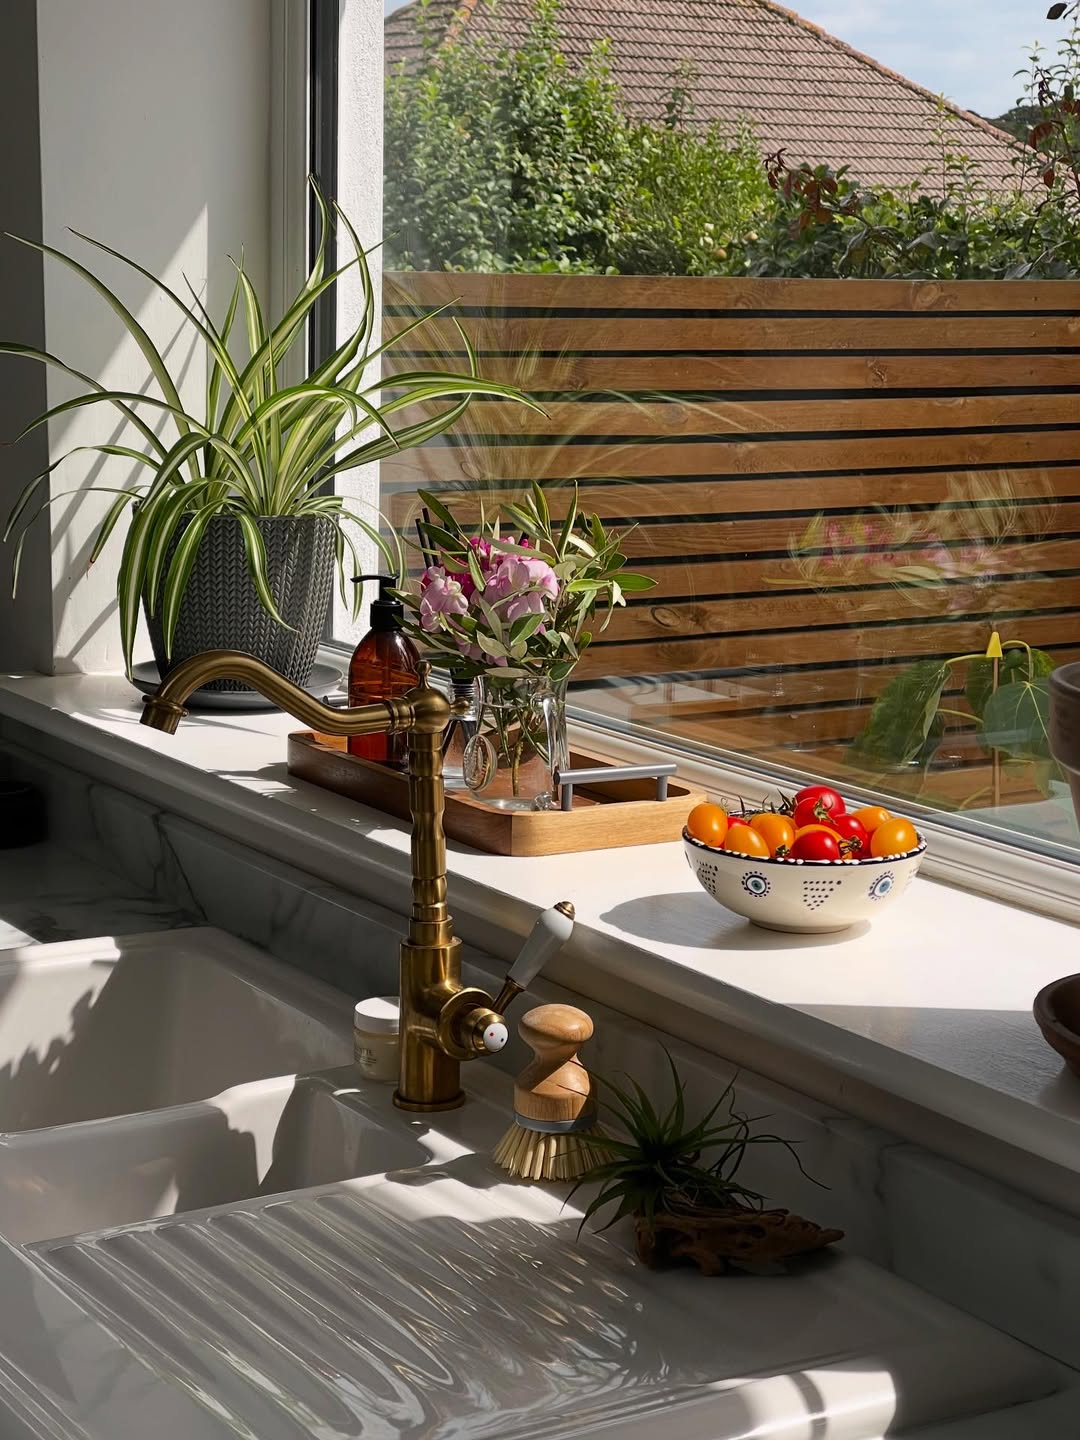
6. Replace the Faucet – $150–$300 Install
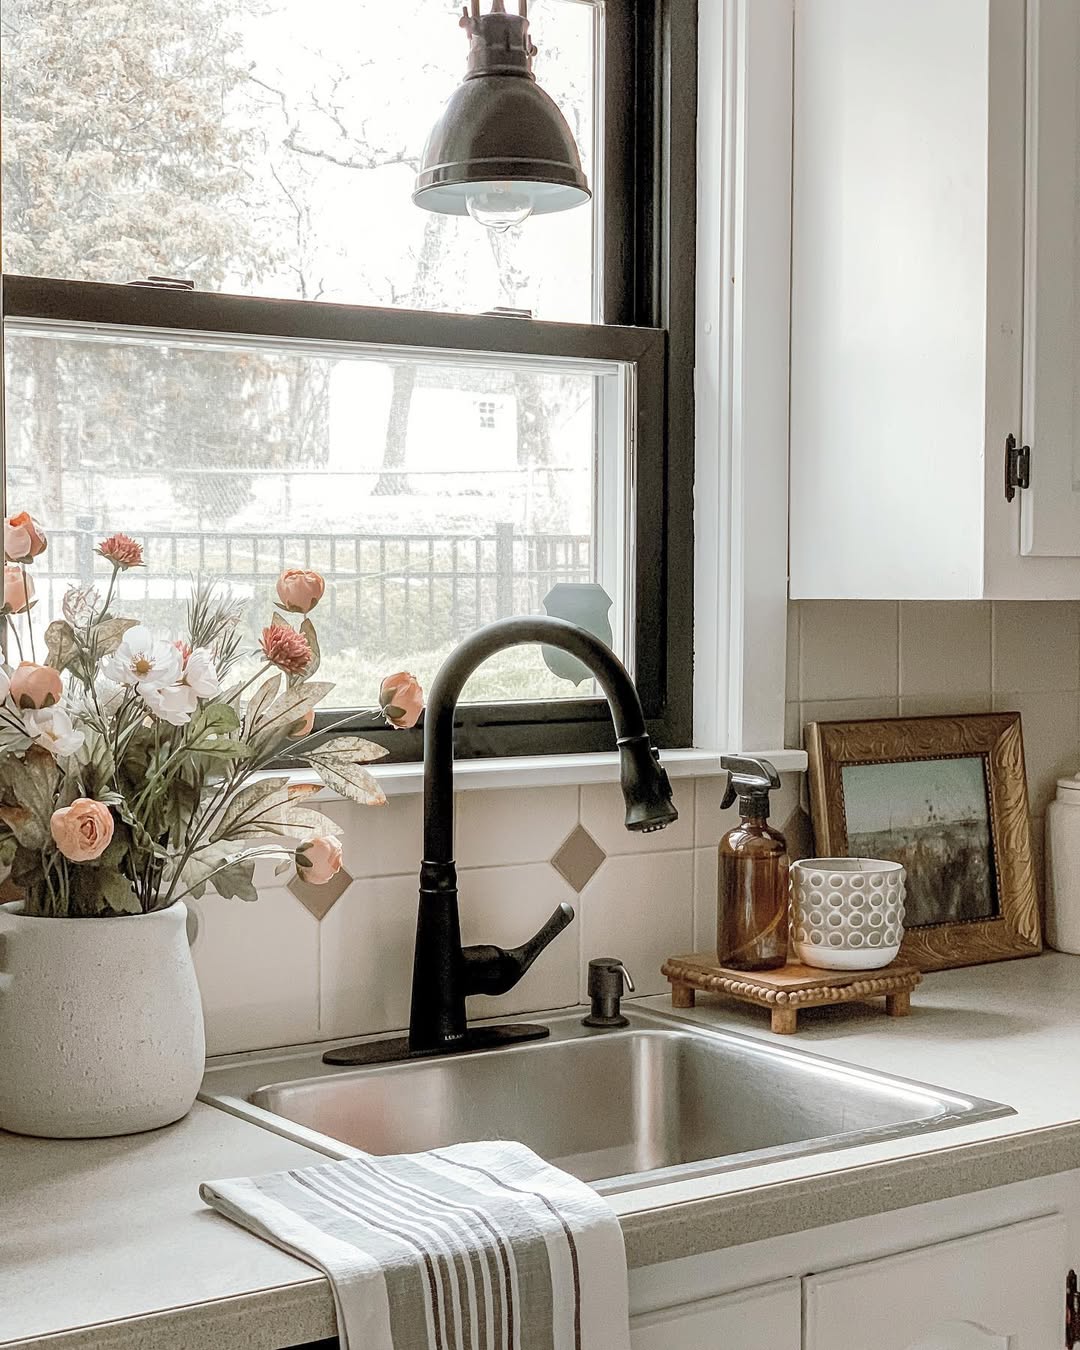
Replacing your faucet delivers one of the most immediate style refreshes—one that also improves daily function.
I went for a matte-black pull-down model, priced at $180, and with about $80 in tools, had it installed myself. My kitchen went from dated to modern with a single hardware swap.
Why it works: According to Angi, total replacement (faucet + labor) typically ranges from $250 to $600, with many homeowners spending around $262 on average.
Many stylish faucets themselves cost under $200, so doing it yourself can significantly reduce your spending.
Some mid-tier faucets run $100–$200, and if you’re confident with basic plumbing, you can do the install yourself and stay under $300 total. For higher-end models or smart faucets, labor costs can increase, sometimes reaching $400 or more.
Watch this YouTube video on how to DIY the faucet:
Pro tip: Add a matching soap dispenser or pull-out sprayer to complete the look—many affordable models include them or have matching options.
7. Update the Sink – $150-$600
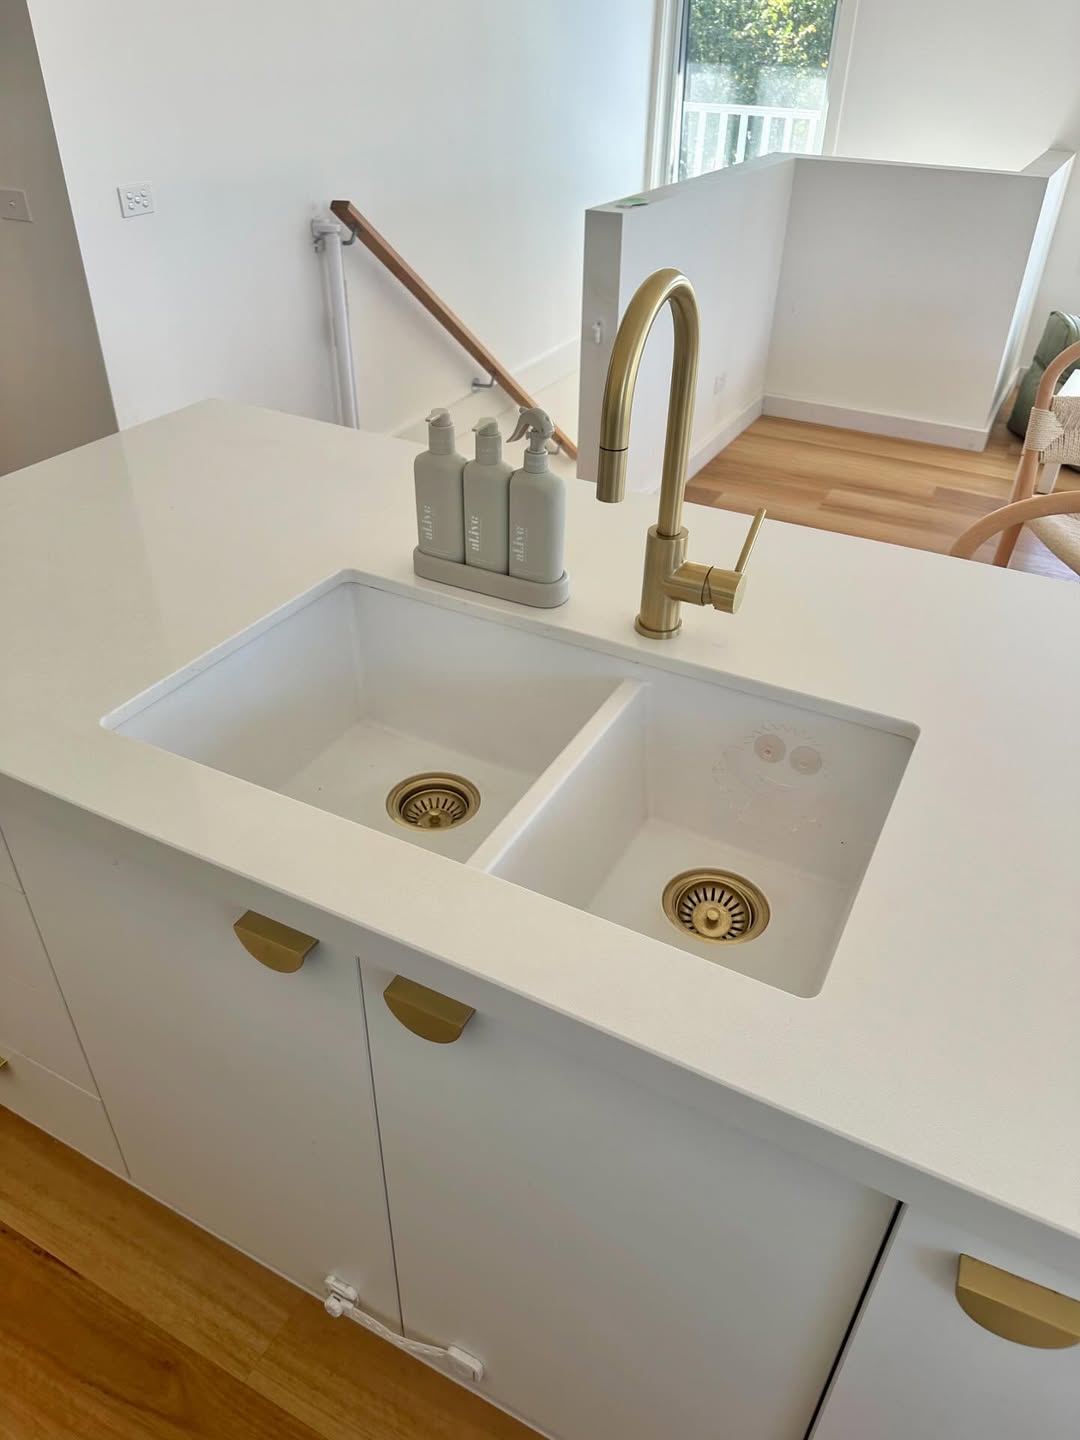
Replacing the sink took my kitchen up a notch. I installed a deep stainless undermount model for about $300, and with basic plumbing knowledge, completed the swap on a lazy Sunday.
Why it works: A new sink gives you better depth, a sleeker look, and an opportunity to update plumbing simultaneously. HomeGuide reports $380–$1,400 total cost, including sink and installation.
Thumbtack notes DIY materials start around $150–$400, and added labor pushes the total towards $300–$800.
How to DIY successfully:
Watch this video below to see an easy DIY sink setup:
Pro tip: Pair your sink upgrade with a new faucet or cutting-board accessory to maximize impact within your budget.
8. Reface or Paint Laminate Countertops – $150-$400
If new counters aren’t in your budget, resurfacing or painting laminate is a game-changer.
I used a concrete-style resurfacing kit in my small kitchen for about $250 and instantly achieved that modern industrial look—without the mess or cost of real stone.
Why it works: HomeGuide reports resurfacing runs $5–$20 per sq. ft., totaling $150–$800 for a typical 30‑40 sq. ft. countertop.
How to DIY it:
- Clean and sand the surface to help the primer and paint adhere.
- Apply a bonding primer.
- Layer your topcoat—epoxy, polymer resin, or specialty paint—in thin, even coats.
- Finish with a clear sealer for durability.
Pro tip: Kits from brands like Giani or Rust-Oleum run between $60–$200—a real steal versus full replacement
9. Add a Portable Kitchen Island – $200-$500
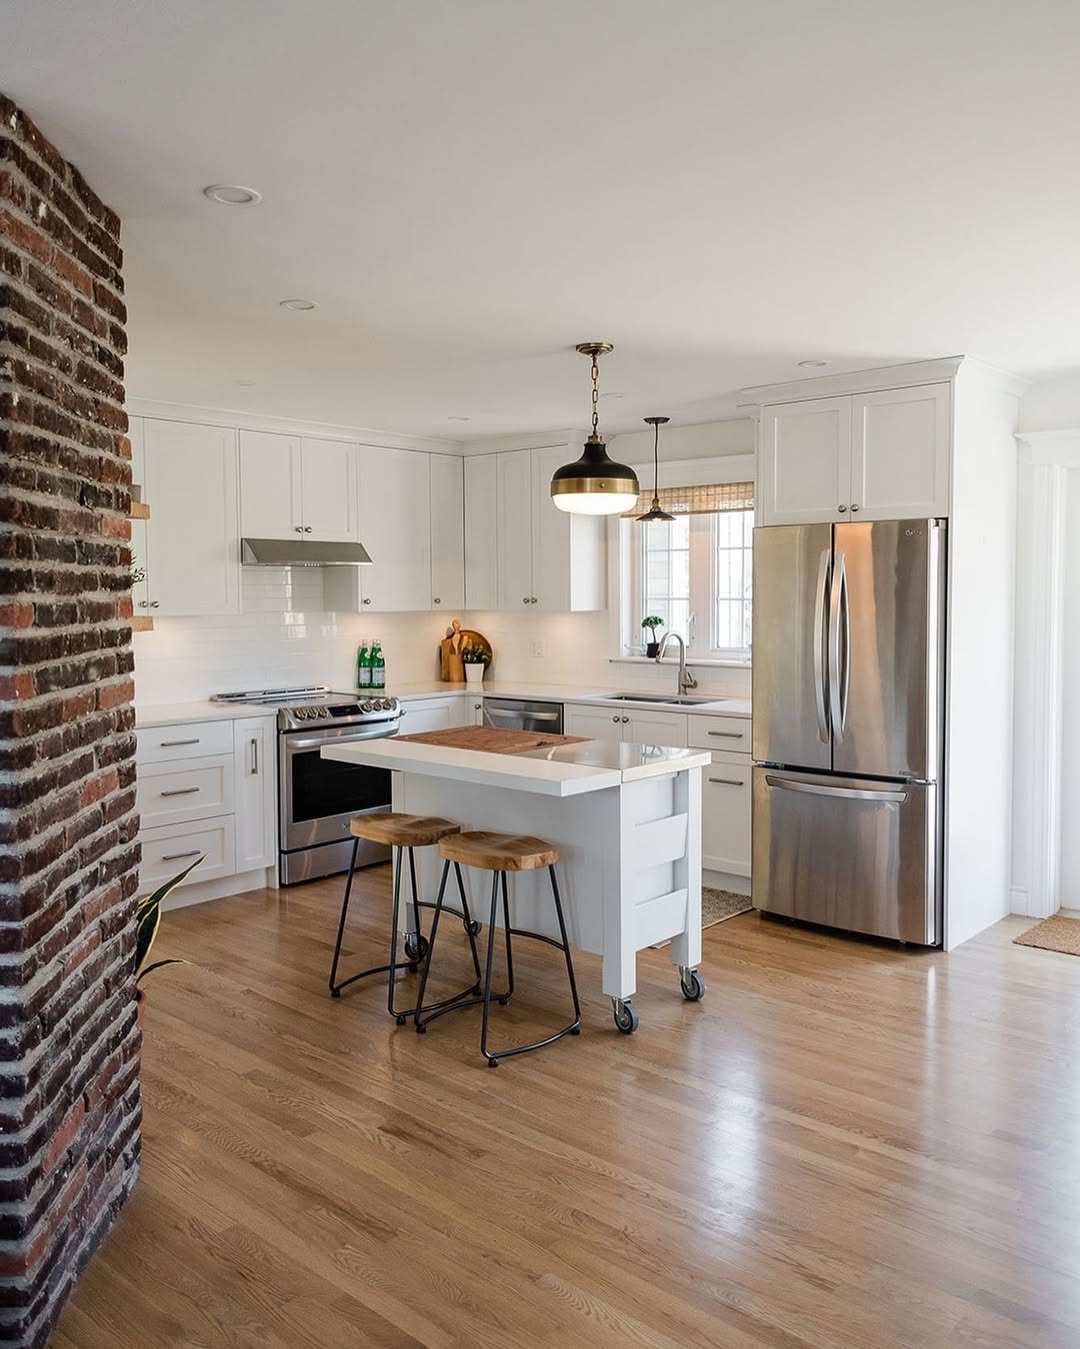
Need more prep space and storage without renovating?
I added a rolling kitchen cart for $180, and it instantly became my go-to meal prep station and extra shelf. When I needed floor space back, I just rolled it away—a total win for small kitchens.
Why it works: Angi highlights that while permanent kitchen islands average at a hefty $4,800, rolling carts can be as budget-friendly as $100 DIY and suit small spaces beautifully. Retailers offer portable islands in the $150–$500 range—think IKEA’s TORNVIKEN model at $399, or Lowe’s kitchen carts starting around $199.
How to choose the right one:
- Measure your floor space and aisle clearance.
- Opt for wheels with stoppers for stability.
- Look for extras like shelves, towel bars, or drawers for versatility.
Pro tip: A pull-out cart with butcher-block top doubles as a prep surface and espresso station—perfect for small, multifunctional kitchens.
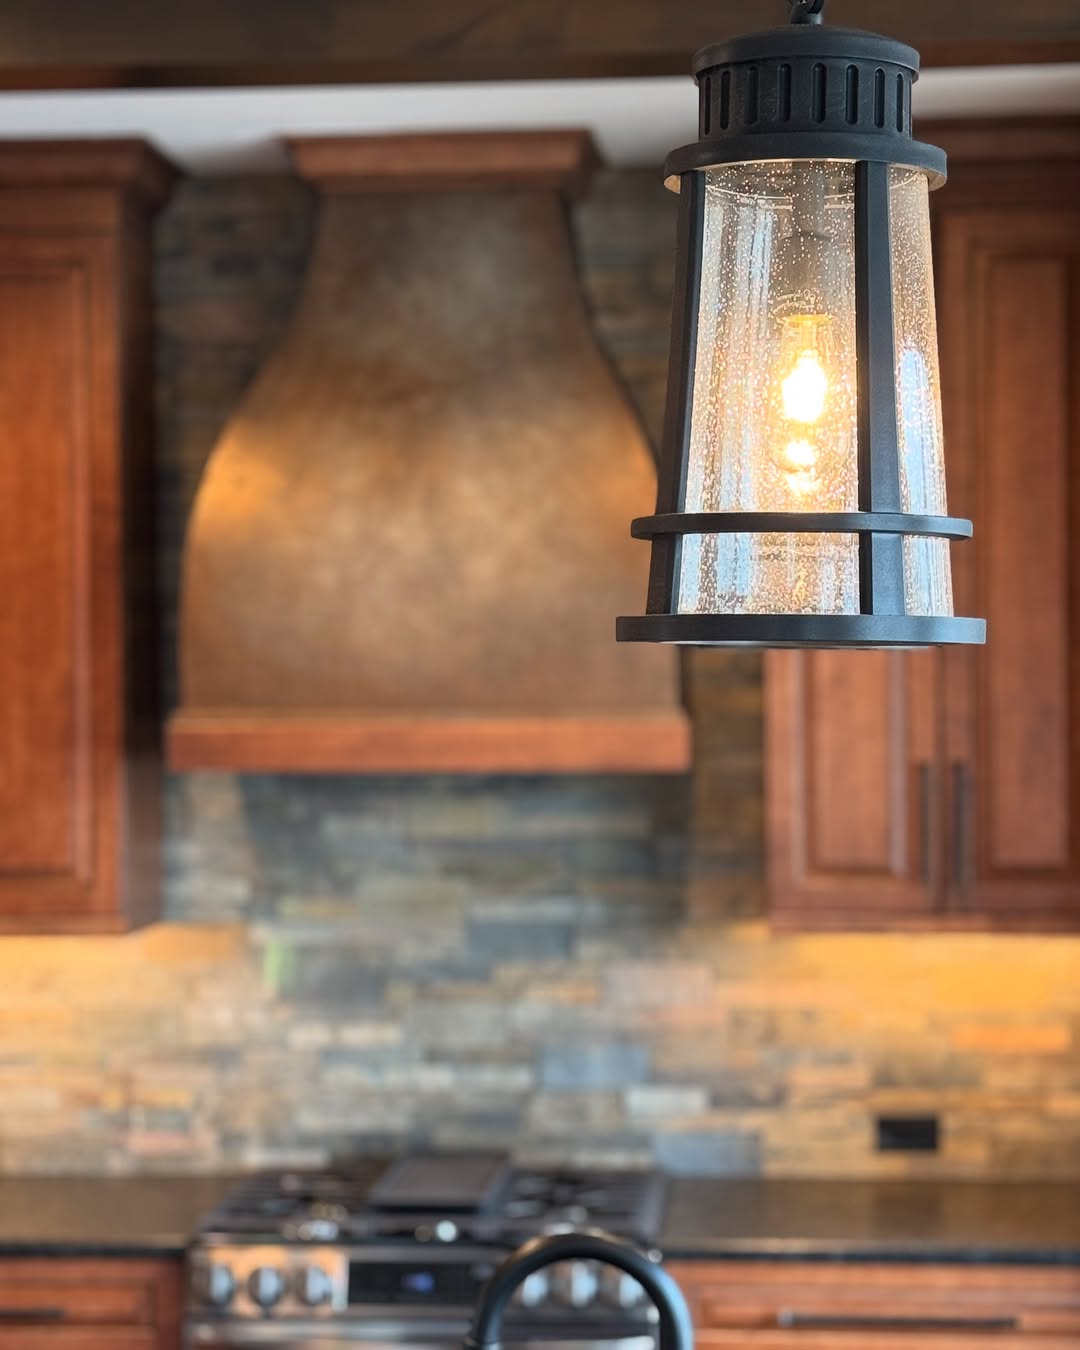
10. Install a New Light Fixture – $100-$250
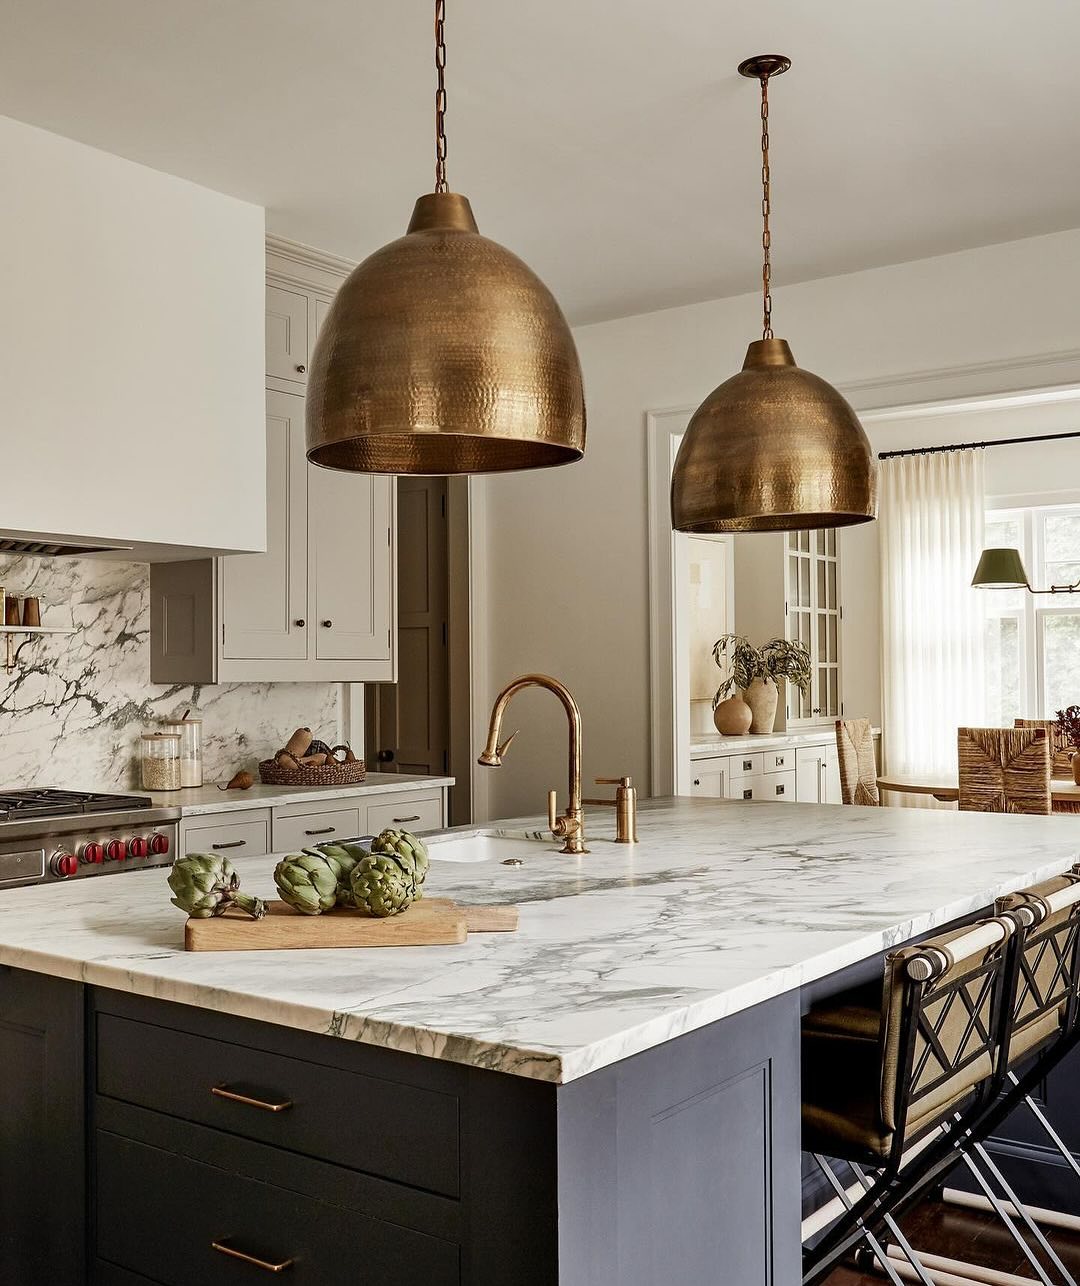
Swapping out an old flush-mount for a trendy pendant—just one upgrade and your kitchen’s vibe leaps forward.
I swapped a dated fixture with a black matte dome pendant using existing wiring. Cost? Just under $200, and the kitchen instantly felt elevated.
Why it works:
The average total cost for installing a new lighting fixture ranges from $158 to $1,016, depending on complexity—but a standard pendant falls between $100–$300 for both fixture and labor. HomeGuard also confirms prices vary in the range of $100-$300.
Pro tip: Position your pendant 28–38 inches above the countertop and space multiples evenly using the 75–80 cm rule for stylish proportion and function
11. Apply Vinyl Flooring – $150-$500
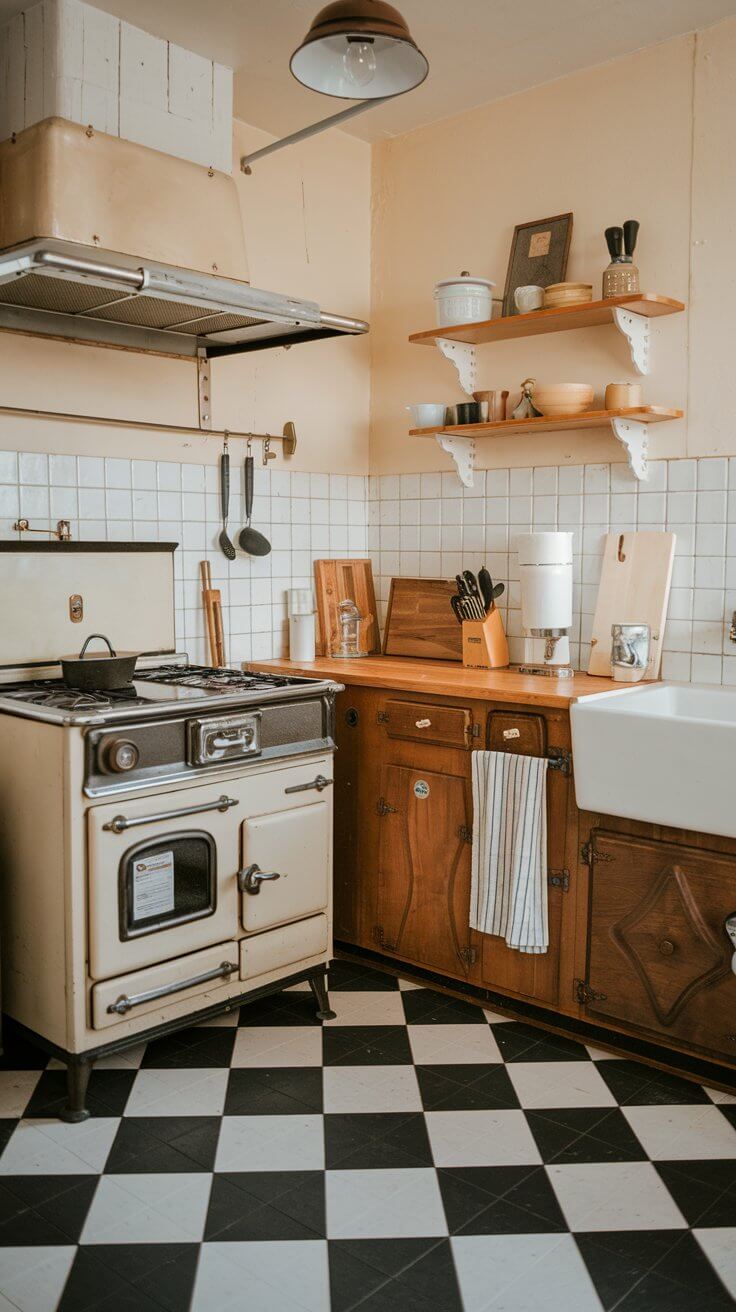
Revamping a tired kitchen floor doesn’t need costly installers or messy demolition—peel‑and‑stick vinyl can give you a fresh, stylish foundation fast.
At about $1–$5 per square foot, this option is both affordable and beginner‑friendly.
On DIY forums, users report saving thousands—one sharer noted that peel-and-stick flooring costs about $700 versus $3,500 for professionally installed LVP flooring.
Action Steps:
- Thoroughly clean and level your subfloor—bumps can cause tiles to crack.
- Measure and lay tiles in a design that suits your space.
- Use spacers or guides for consistent spacing.
- Regular maintenance = sweeping + damp mop—easy to keep clean.
Pro tip: If you’re tackling around appliances or awkward corners, start with the cut pieces and work outward for a neater finish.
12. Fresh Coat of Paint on Walls – $100-$300
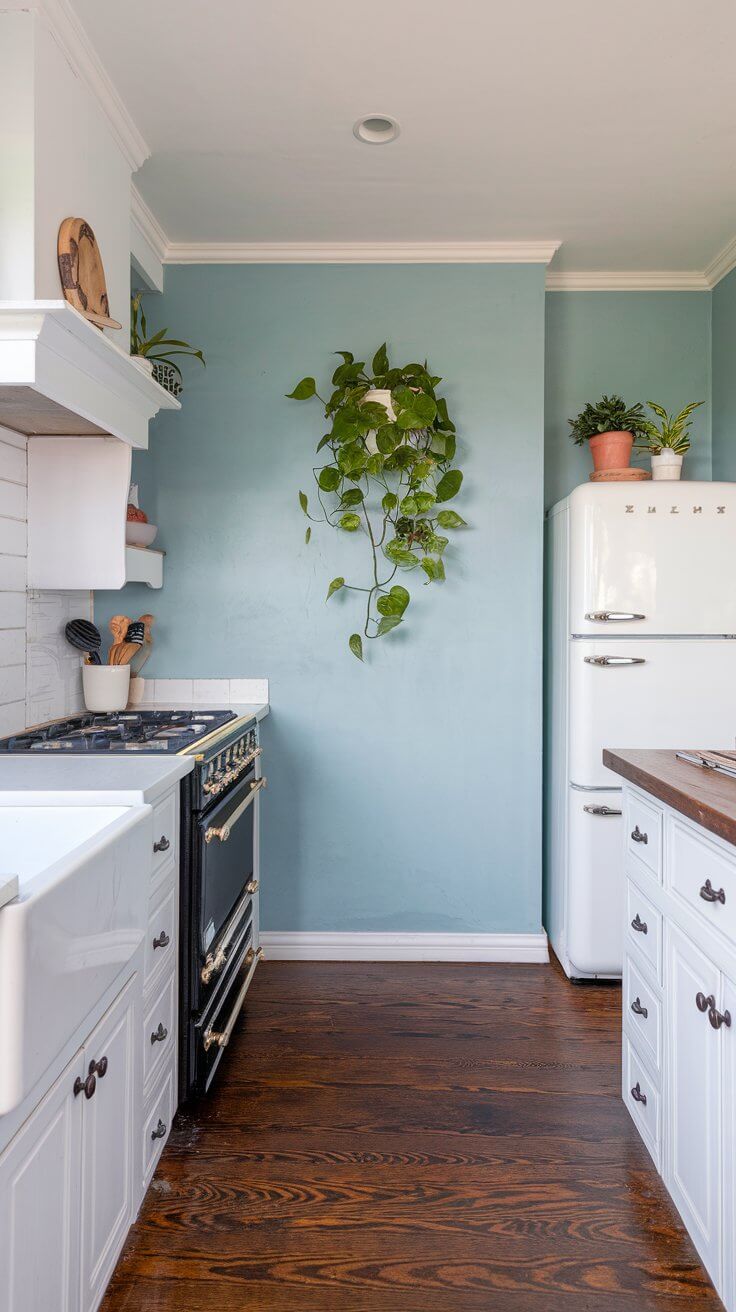
A fresh paint job works magic in a small kitchen. Choose pale or pastel tones to bounce light around and make the room feel airier and wider.
Why it works: Paint and basic supplies fall between $100–$300, depending on your kitchen’s square footage and your finish choices.
DIY Process:
- Clean and lightly sand to prep the walls.
- Use painter’s tape around trim for crisp lines.
- Apply primer, followed by two coats of your chosen color.
- Let each coat dry fully—crisp walls take patience.
Pro tip: Use semi-gloss or satin finishes so walls can be easily wiped down—practical and polished.
13. Add a Chalkboard Wall – $10 – $25
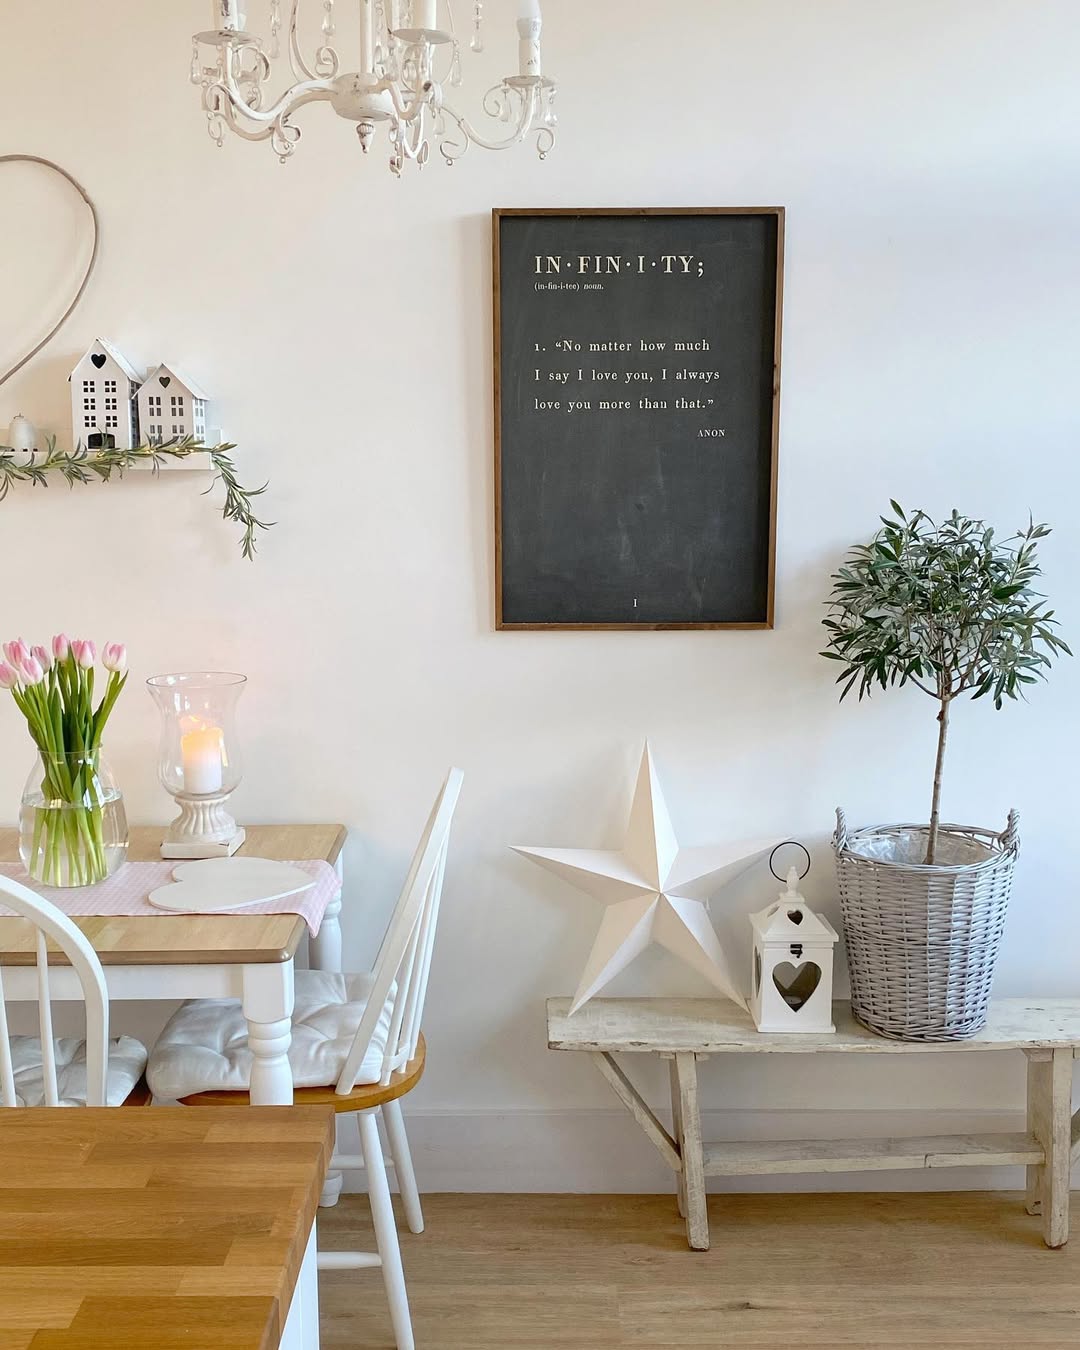
A chalkboard wall is not just creative—it’s practical. It’s perfect for grocery lists, recipes, doodles, or recipe brainstorming—all while keeping surfaces clear.
One savvy DIYer used a $10 can of Rust-Oleum chalkboard paint to transform her backsplash—sealing a unique look in under an afternoon.
Another tutorial confirms chalk paint costs practically nothing—about $10 for paint, plus optional trim.
Step-by-Step:
- Choose a smooth, clean wall and tape edges for clean lines.
- Apply primer if needed, then two coats of chalkboard paint.
- Season with chalk before writing—this prevents ghosting.
- Add a framed trim if you want a polished look.
Pro tip: Consider adding a magnetic primer underneath for an extra handy surface—great for hanging notes or recipes.
14. DIY Tile Backsplash – $200-$600
Want a standout kitchen feature with character and style? A real tile backsplash adds depth—even if your budget is measured in hundreds, not thousands.
Why it works: DIY ceramic or subway tile installations typically fall in the $200–$600 range, depending on materials and grout.
How to DIY it:
Watch this small YouTube video and you’ll instantly understand how easy it is:
Pro tip: Pick larger tiles to make a small kitchen feel more spacious—fewer grout lines make the eye travel, elongating the wall.
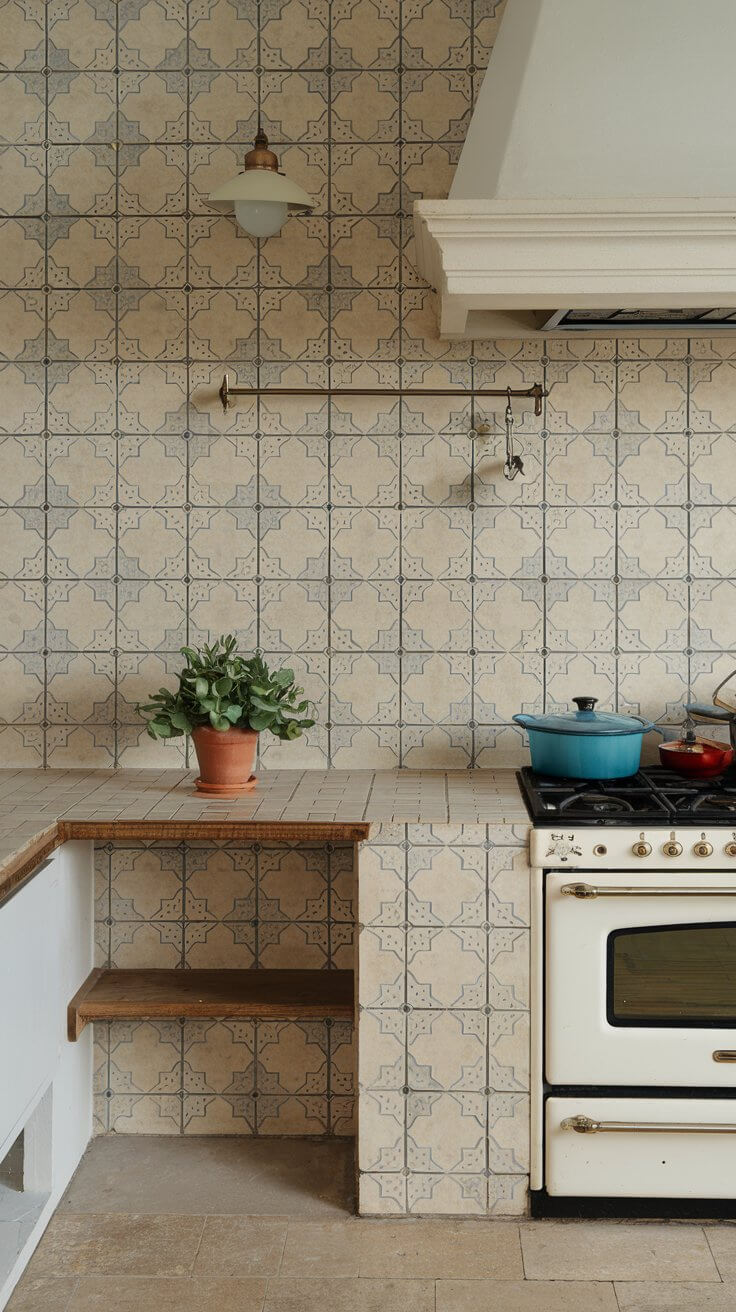
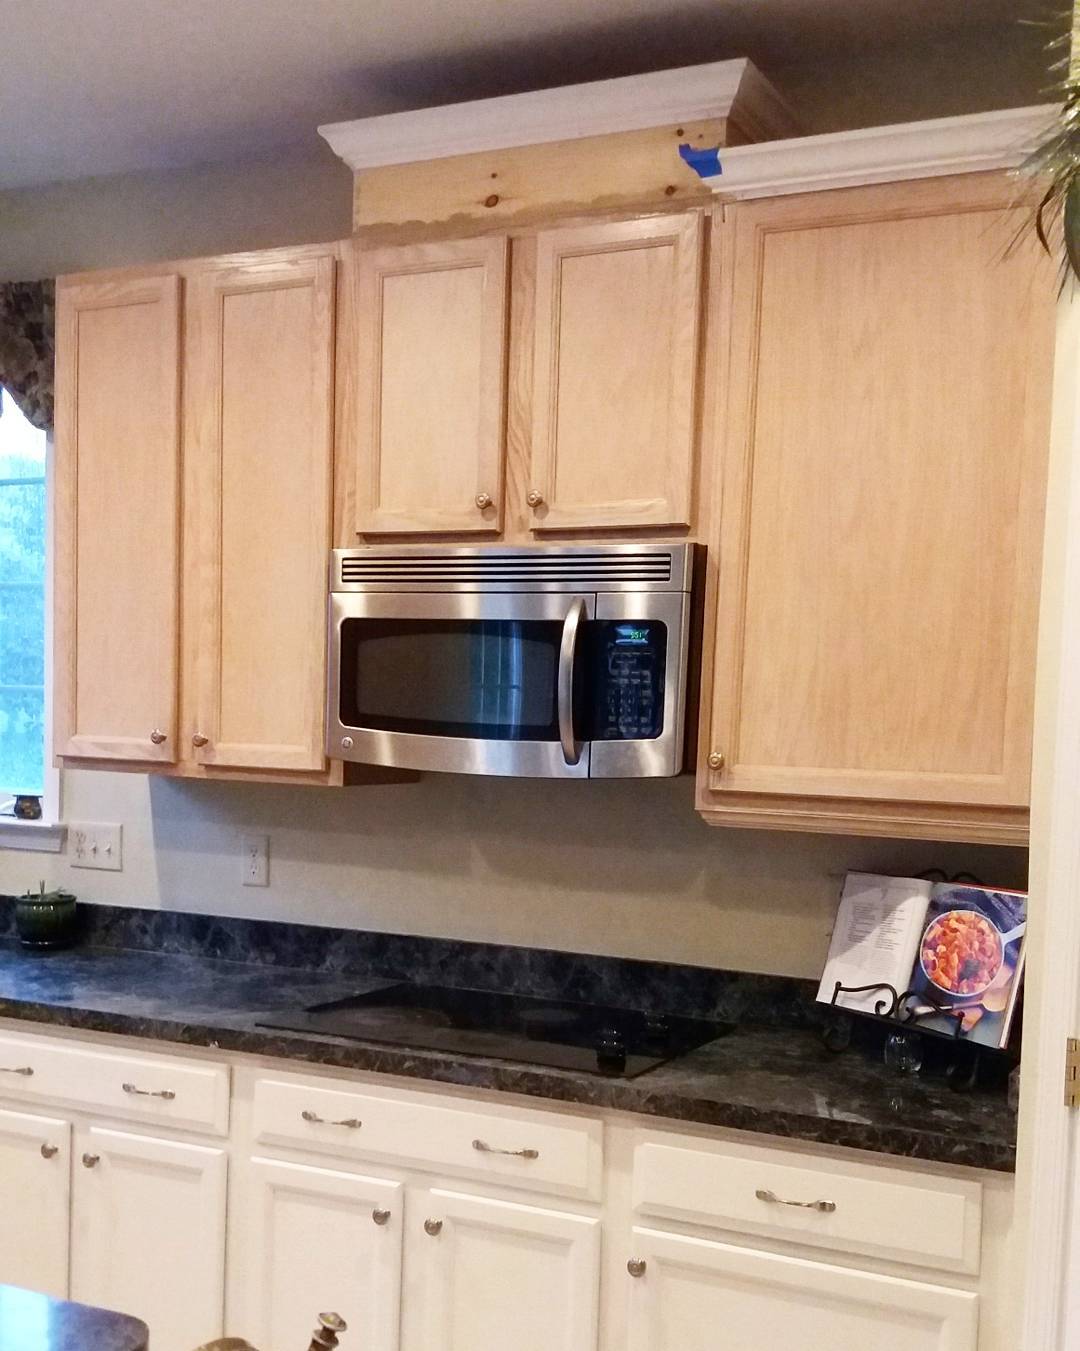
15. Add a Statement Range Hood Cover – $150–$400
A range hood doesn’t have to be boring or industrial-looking.
I wrapped my standard stainless hood with a DIY shiplap cover for about $220, and suddenly it became the centerpiece of my small kitchen. With a little wood, trim, and paint, even the most builder-basic hood can feel custom and high-end.
Why it works: Range hoods are naturally the focal point of a kitchen wall., And they are also very trendy because they add architectural detail and tie cabinetry together—without changing out the actual venting system. For $150–$400 in materials, you can create a tailored look that rivals expensive custom hoods.
How to DIY:
- Measure your existing hood to design a frame that fits snugly.
- Use lightweight plywood or MDF panels, then face it with shiplap, beadboard, or decorative trim.
- Prime and paint (or stain) to match or contrast with cabinets.
- Ensure access for vent cleaning—leave a removable panel if needed.
Pro tip: Paint your hood cover the same color as your cabinets for a seamless, built-in look—or choose a contrasting finish (like black, navy, or natural wood) for a bold, designer vibe.
16. Replace Cabinet Doors – $300-$600, if Pro (~$2,500)
When painting doesn’t satisfy your style itch, swapping out cabinet doors is a bold, beautiful update that doesn’t demand a full renovation.
I upgraded my shaker-front doors with pre-made MDF panels for about $450 total, and the result felt custom without the cost.
Why it works: Experts estimate that replacing all the doors in a small kitchen costs around $2,000–$2,500 with professional help, meaning DIYers can save big by doing it themselves.
Meanwhile, individual replacement doors start around $45–$70 each, depending on style and material, making total costs doable within the $300–$600 range for most kitchens.
How to DIY:
- Remove and label old doors and hinges.
- Measure opening dimensions precisely.
- Choose your style—slab, shaker, raised panel—and order.
- Install, adjust alignment, and enjoy the refreshed look.
Pro tip: Prefinished doors save time—and splatter paint won’t be an issue later!
17. Add a Rug or Runner – $50-$150
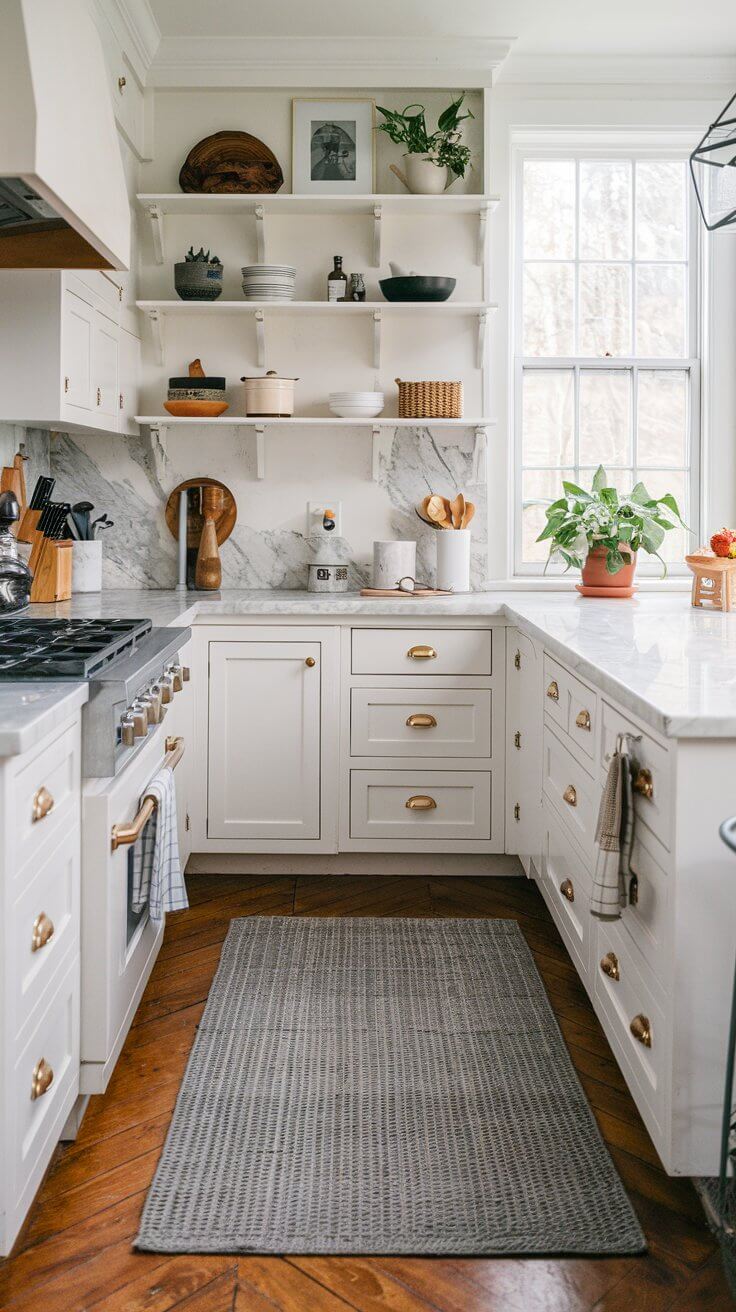
If you want a quick decor injection, a rug or runner underfoot can change everything.
I recently placed a washable cotton runner by the sink—priced at $60—and suddenly my kitchen felt cozy and styled, regardless of my minimalist cabinets.
Why it works: Design pros say a well-chosen rug introduces warmth, texture, and personality—even hides floor wear in high-traffic zones. Epicurious even encourages rugs in kitchens for their cozy value and stain-hiding power—as long as you pick durable materials and clean regularly.
Placement tips:
- Use flatweave rugs for easy cleaning.
- Stick with washer-safe or easily spot-cleanable fabrics.
- Size wisely: runners in front of prep zones; small rugs near entry or dishwasher.
Pro tip: Visit rug clearance sections—some offer gorgeous indoor/outdoor runners for under $25.
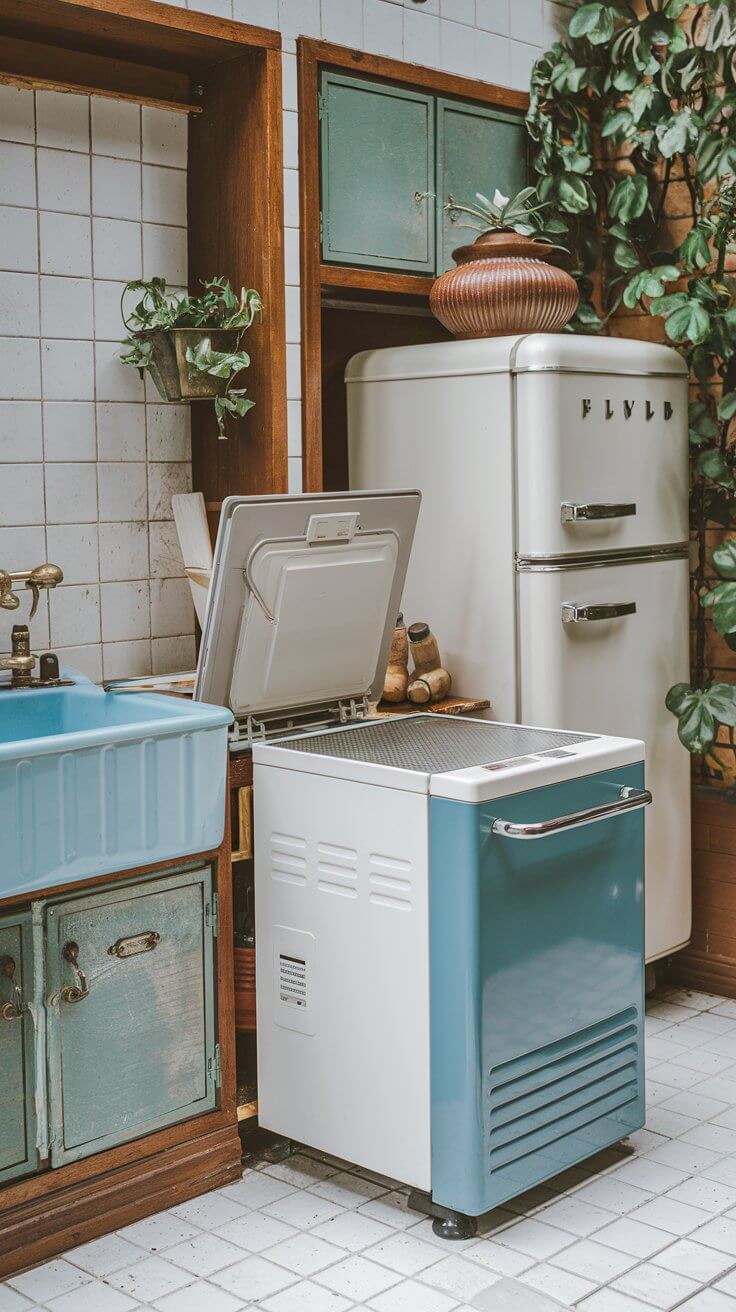
18. Upgrade Appliances (Used or Discounted) – $300-$1000
Want an appliance refresh without breaking the bank? Refurbished, scratch-and-dent, or open-box models are smart ways to upgrade.
I scored a stainless-steel dishwasher with a dented handle for $350, nearly $600 off retail—still under warranty and spotless in performance.
Why it works: Experts at Real Simple applaud this method for its eco-conscious value and savings, especially when appliances lose up to 40% of value as soon as they leave showroom floors.
Reddit users often report 30–50% discounts by shopping at scratch-and-dent outlets or open-box sections.
How to shop smart:
- Check warranty coverage—many open-box units still qualify.
- Inspect in person when possible for damage that won’t affect performance.
- Ask about delivery and installation options.
Pro tip: Appliances depreciate less when sold used, so you’ll recover resale value better if you move soon.
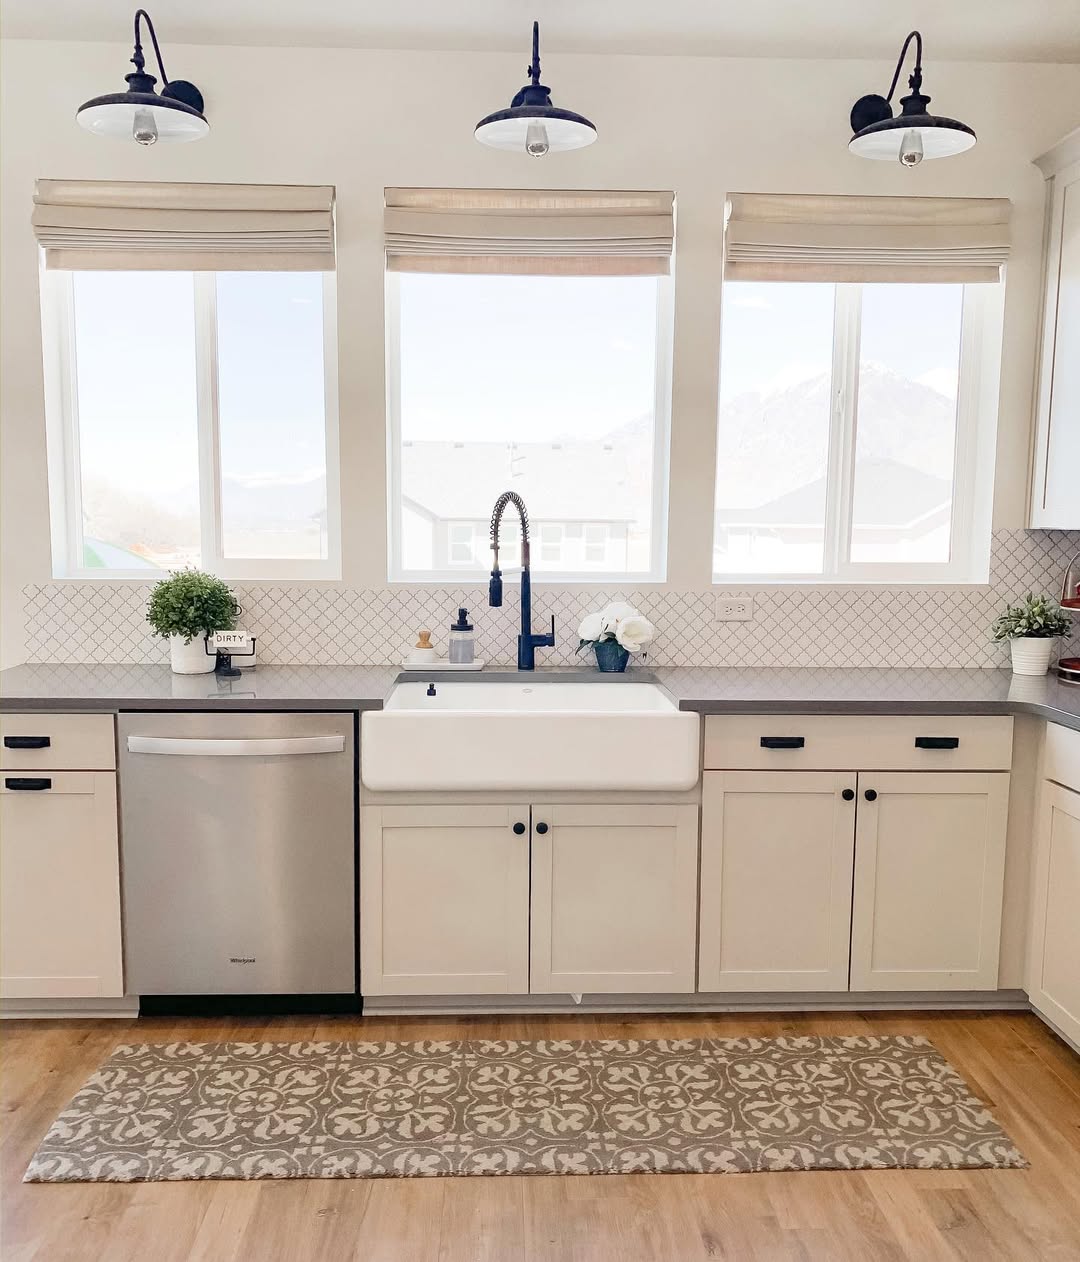
19. Add Window Treatments – $50-$150
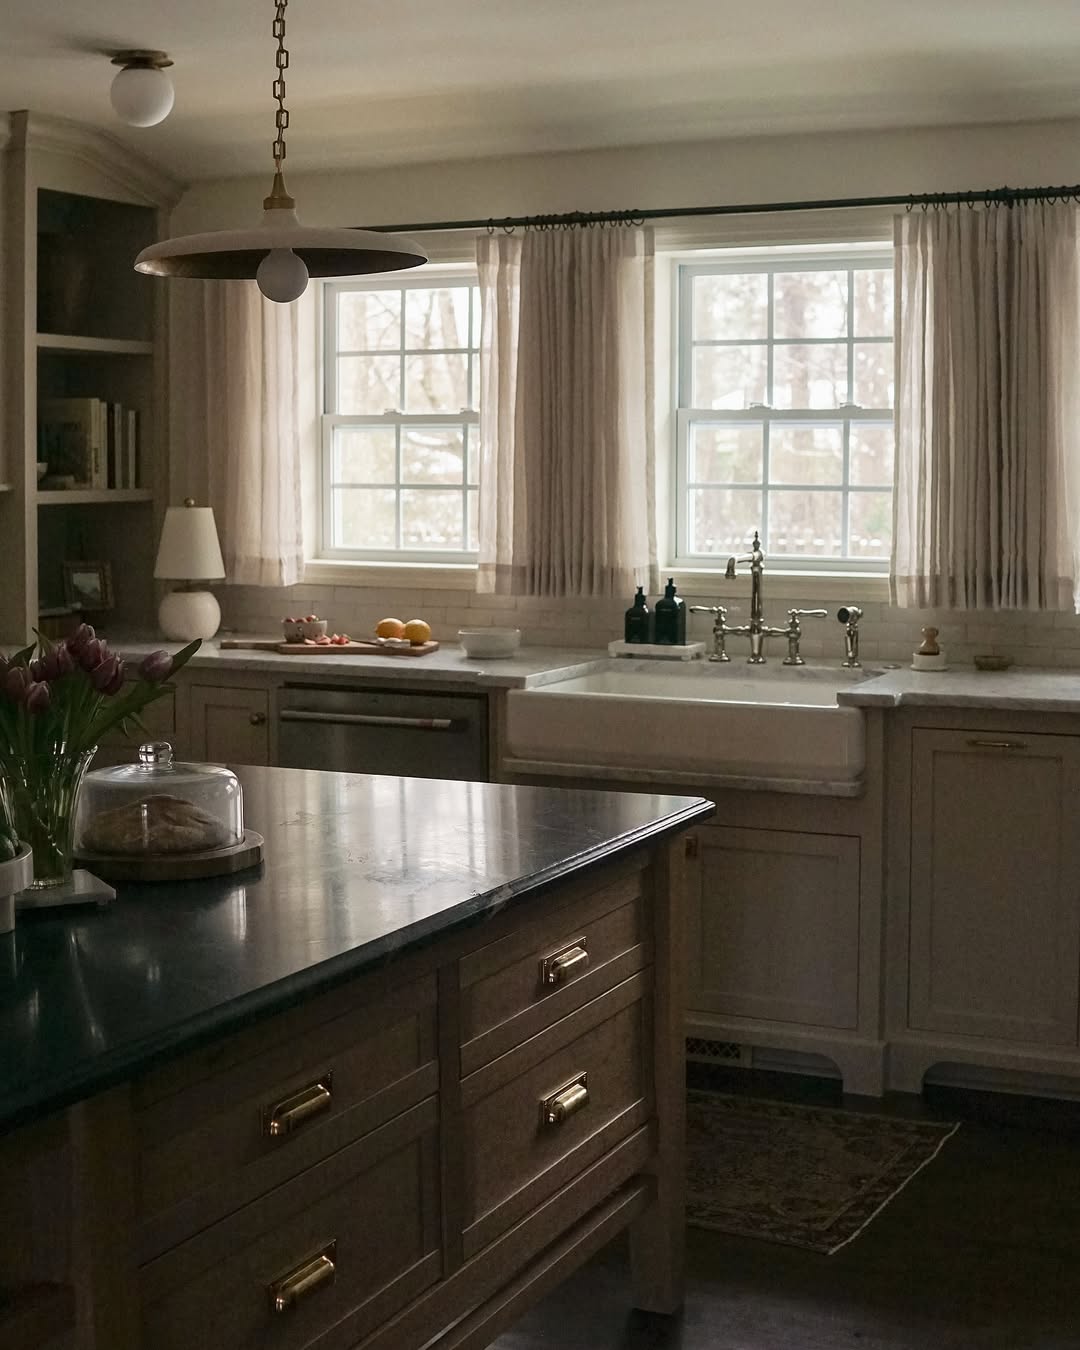
A fresh shade or valance instantly refines your space—and controls light and glare while you cook.
I installed bamboo Roman shades for about $80, and the softer light transformed my window into a design feature.
Why it works: Many designers emphasize that window treatments enrich texture and style while improving comfort.
Easy installation steps:
- Measure window width and drop carefully.
- Choose light-filtering fabrics for function; patterned textiles for visual interest.
- Many shades come with tension rod or peel-and-stick options for renters.
Pro tip: Choose washable or moisture-resistant fabrics—foil-backed or faux-wood shades handle splashes smartly.
20. Install a Pot Rack – $100-$300
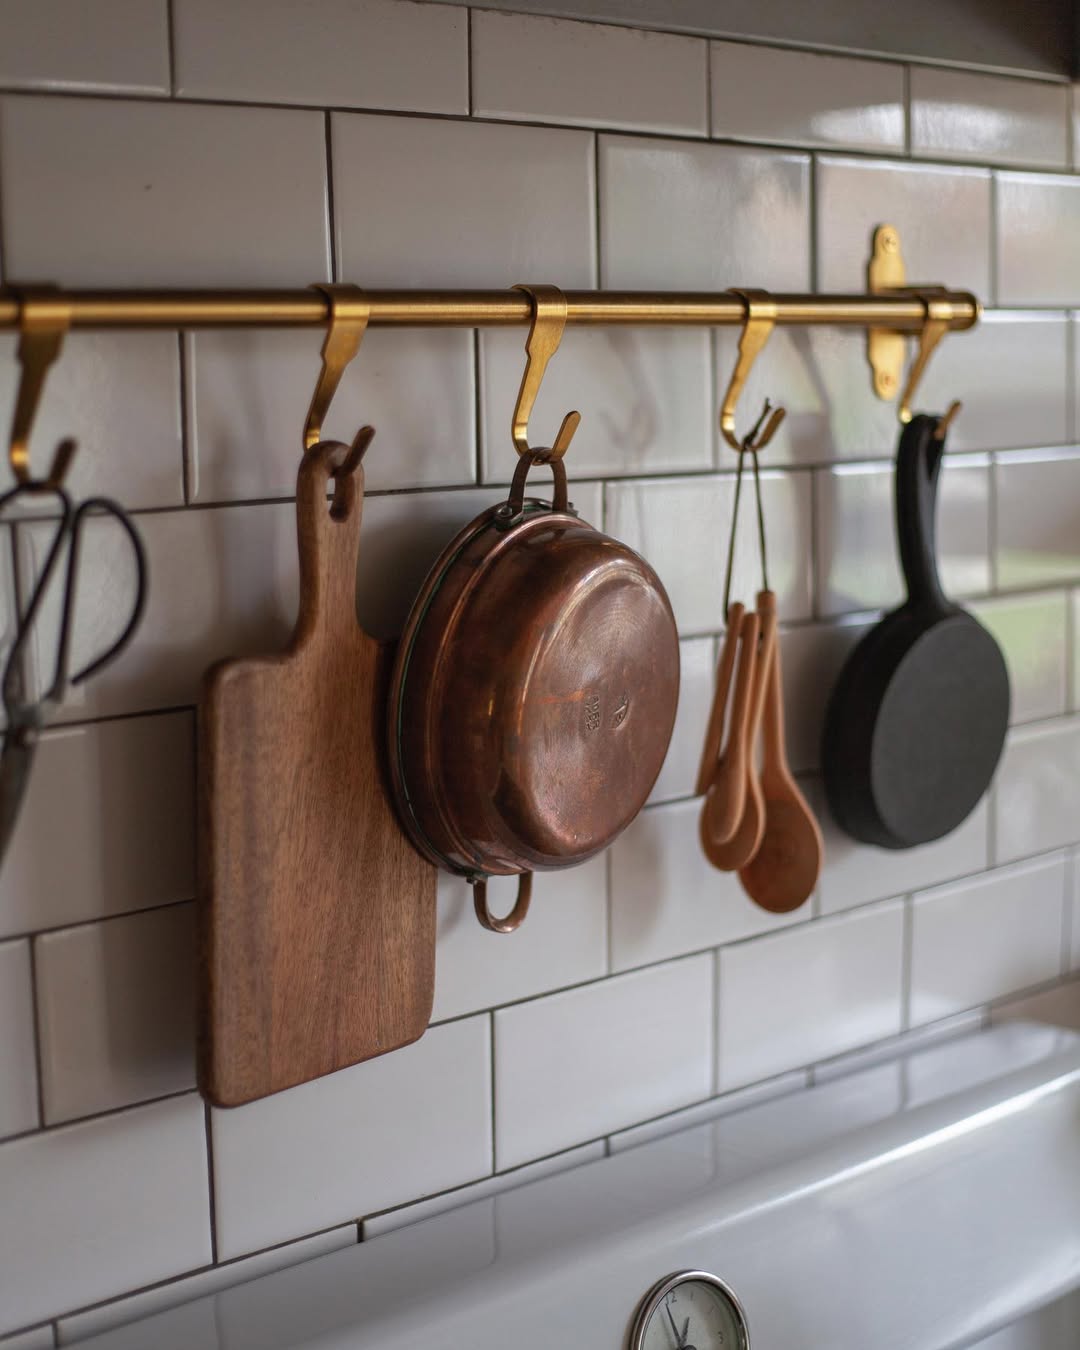
Say goodbye to stuffed cabinets—hanging your pots not only frees up space but adds visual charm by displaying your favorite pans like art.
My small kitchen got a rustic makeover when I hung a wall-mounted iron rack for $120—prettier and more functional at once.
Why it works: Pot racks create storage that’s useful and effortlessly decorative—especially great in small spaces where every cabinet counts.
Installation made simple:
- Decide between wall- or ceiling-mount—ceiling saves wall space but needs stud support.
- Use strong anchors or toggle bolts to handle weight.
- Arrange by function and size, or group like cookware for visual appeal.
Pro tip: Buy a pre-fab rack with hooks included—many ready-made styles are under $150 at Home Depot or IKEA.
21. Use Stick-on Tile for Countertops – $100-$300

Looking for a budget-friendly way to refresh your counters? Stick-on countertop tile, similar to peel-and-stick backsplash, offers instant style.
I resurfaced about 12 linear feet (24″ depth) of counters for around $80, using peel-and-stick marble-look panels, and it elevated the design without breaking the bank or creating construction noise.
Why it works: If you check them out on Wayfair, peel-and-stick overlays cost as little as $2.05 per sq ft., making them an affordable temporary fix or rental-friendly update.
How to DIY:
- Clean and smooth the countertop surface.
- Measure carefully and plan your layout.
- Apply the panels, then trim with a sharp blade.
- Seal edges with clear silicone for durability.
Pro tip: Fill grout lines or damaged spots first—smooth surfaces are essential for adhesion, as advised in DIY forums
22. Install a Glass Tile Backsplash – $200-$600
Want a backsplash that wows? Glass tiles add elegance and dimension with their reflective shimmer.
I once installed a gray glass subway tile backsplash in a weekend for about $350—instantly made my kitchen feel cleaner, brighter, and more refined.
Why it works: Glass tiles elevate kitchen aesthetics with their depth and light-catching. Expect $200–$600, depending on tile quality and square footage.
How to DIY:
- Prep walls by cleaning and smoothing.
- Use thin-set mortar with a notched trowel.
- Carefully place each tile with spacers.
- Grout once set, then seal for moisture protection.
Pro tip: Light-colored grout maximizes the glow of glass; darker grout offers modern contrast—choose based on your lighting and style goals.
For more on which backsplash would be best for your kitchen, check out this article.
23. Create a Coffee Station – $50-$200
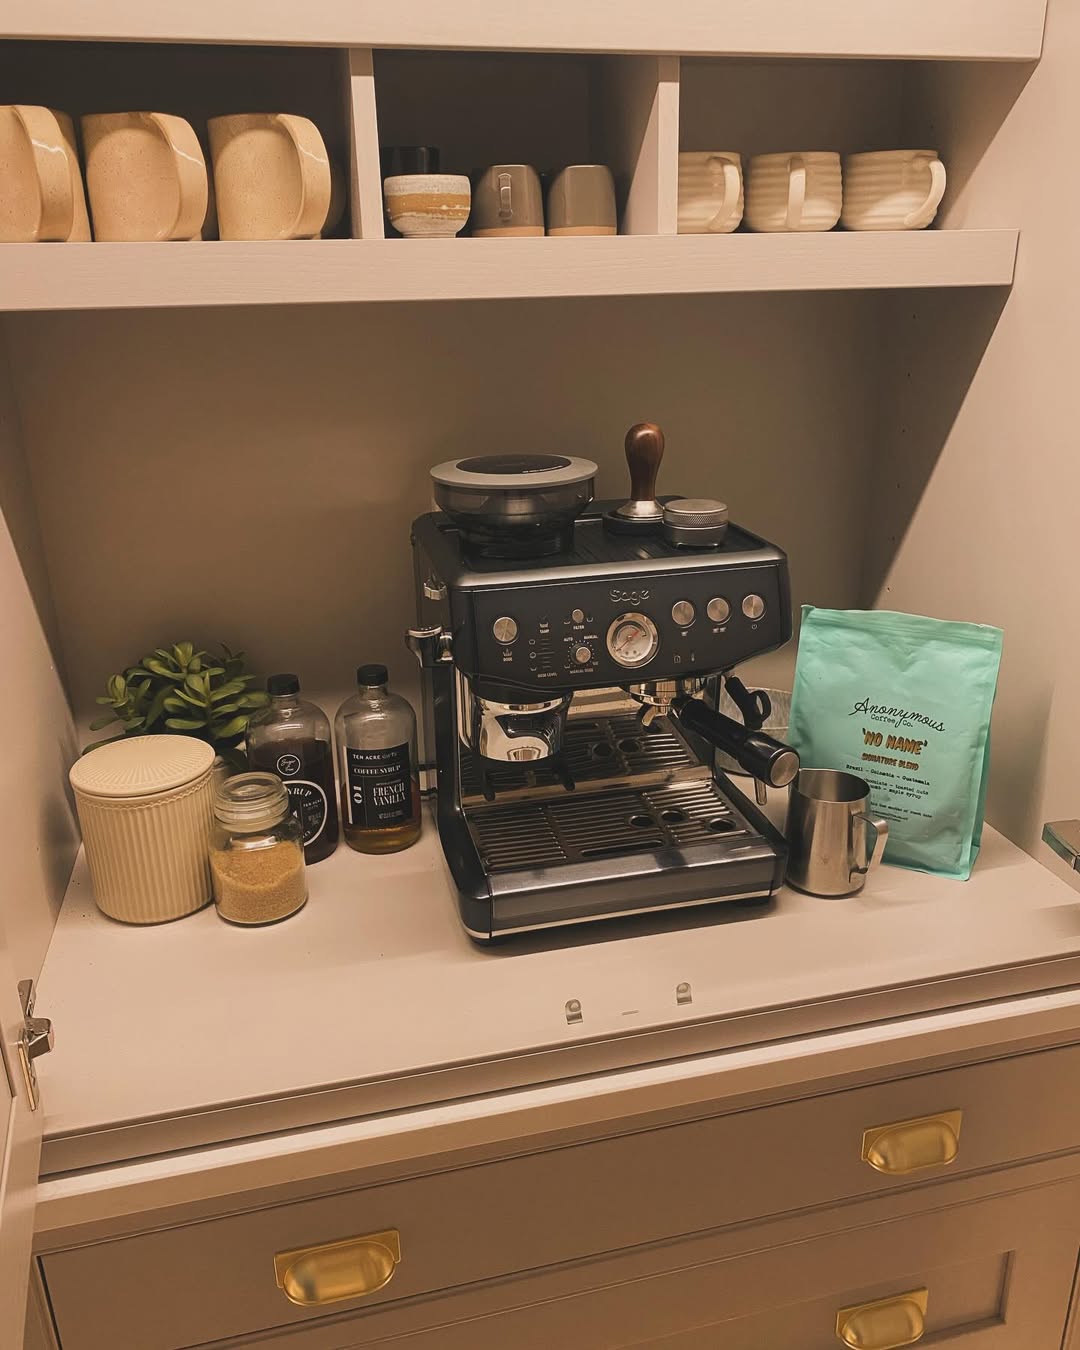
Turning a nook into a coffee station was one of my favorite small-kitchen upgrades. A small bar cart, a few mugs, and storage bins took just $120, turning my mornings into a ritual I genuinely looked forward to.
Why it works: A dedicated coffee bar makes mornings smoother and adds character—even in compact kitchens, approved by The Spruce as well.
How to DIY:
- Select a little counter or cart space.
- Add essentials: coffee maker, mugs, pitcher, and jars.
- Organize on a tray or shelf to keep it tidy and inviting.
Pro tip: Black and white host a clean, Instagram-worthy look—add a chalkboard sign for daily messages or latte art practice!
24. Replace Cabinet Shelves – $100-$300
Sagging or worn cabinet shelves? Swapping them can restore both form and function—quickly and affordably.
I replaced two warped particle-board shelves with solid hardwood versions for $180, and my cabinets now look sharper and feel sturdier every time I open them.
Why it works: Replacing shelves refreshes the interior and improves usability. Quality pre-cut shelving or cedar planks start at roughly $25–$50 per shelf, depending on wood type and size.
How to DIY:
- Remove old shelves and clean interior.
- Measure carefully for width, depth, and height.
- Purchase or cut matching boards.
- Install using adjustable shelf pins or fixed cleats.
The video below showcases how it can be done easily:
Pro tip: Opt for wood types like birch or maple—they handle moist kitchen items better than cheap particle board.
25. Add Peel-and-Stick Wallpaper – $50-$200
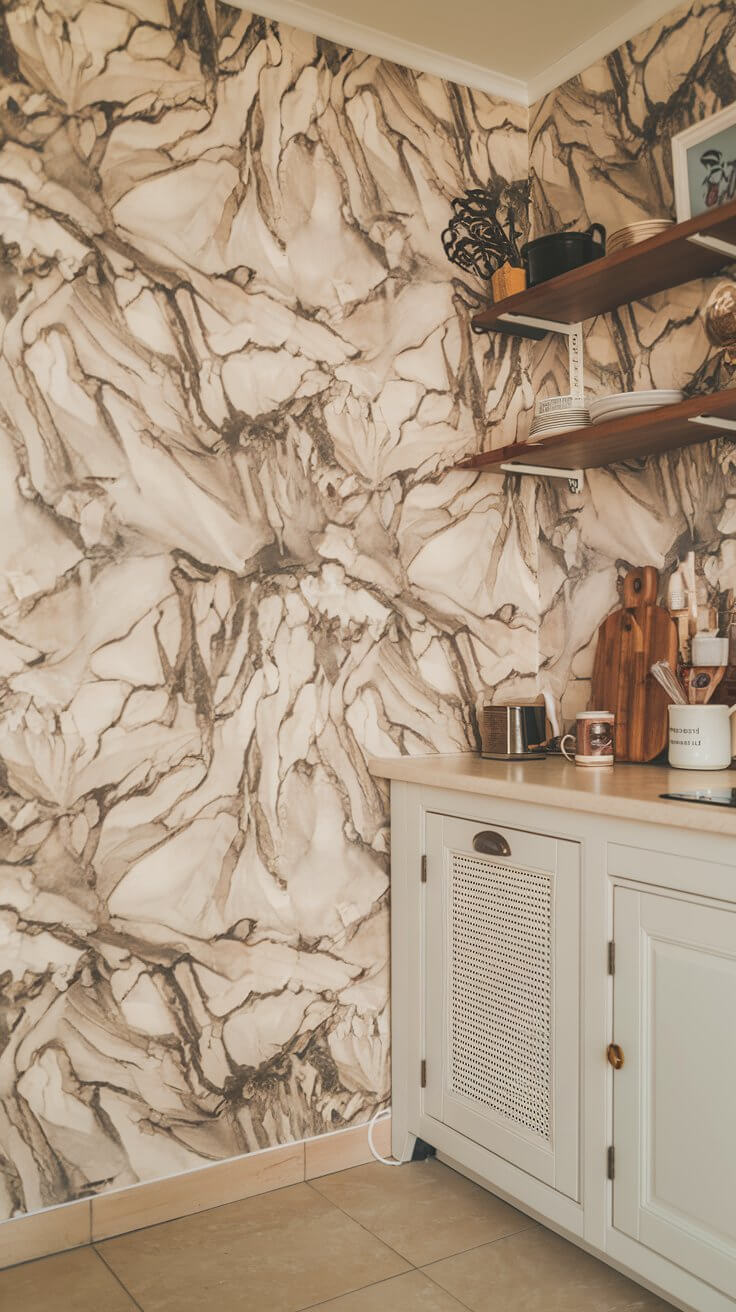
A pop of peel-and-stick wallpaper can bring personality to a wall or accent section.
I used water-resistant botanical wallpaper on a small pantry door for under $80, and it instantly added charm—without moisture worries or commitment.
Why it works: DIY bloggers rave about how affordable and impactful removable wallpaper is—especially kitchen-friendly, water-resistant designs that handle steam and splashes well.
How to DIY:
- Clean and smooth your surface thoroughly.
- Measure and align the first strip carefully.
- Peel, stick, and smooth out bubbles as you go.
- Trim edges cleanly and overlap patterns precisely.
Pro tip: Choosing moisture-resistant or vinyl-backed paper ensures longevity around backsplash areas or sinks.
26. Update Outlet Covers – $20-$50
Tiny detail, big impact. I replaced my plain beige outlets with crisp matte-white decora-style covers for around $3 each, and it instantly elevated the finish of my kitchen.
Why it works: Outlet covers are inexpensive yet visible across your kitchen—switching them out sends a subtle but powerful message: every detail matters.
According to HomeGuide, covers cost $0.50 to $20 each, depending on style and finish
How to DIY:
- Turn off the breaker.
- Unscrew and remove the old cover.
- Clean the surface, then align and secure the new one.
- Choose finishes (bronze, black, nickel) that complement your hardware.
Pro tip: Try screwless designs for a sleeker, high-end look that feels thoughtful and modern.
27. Change Window Sills – $100-$300
Window sills are often overlooked—but they frame your light and view. I repainted mine with semi-gloss and felt like I had brand-new windows.
Why it works: Repainting or replacing sills gives your architecture polish and longevity. It is also one of the easiest ways to refresh small architectural details without a full remodel.
How to DIY:
- Lightly sand the sill and fill any dents.
- Use a durable semi-gloss paint.
- For deeper damage, swap out the sill with a prefabricated or custom-cut board.
Pro tip: Use UV-resistant paint to keep colors bright in sunny kitchens.
28. Install a Magnetic Knife Strip – $30-$70
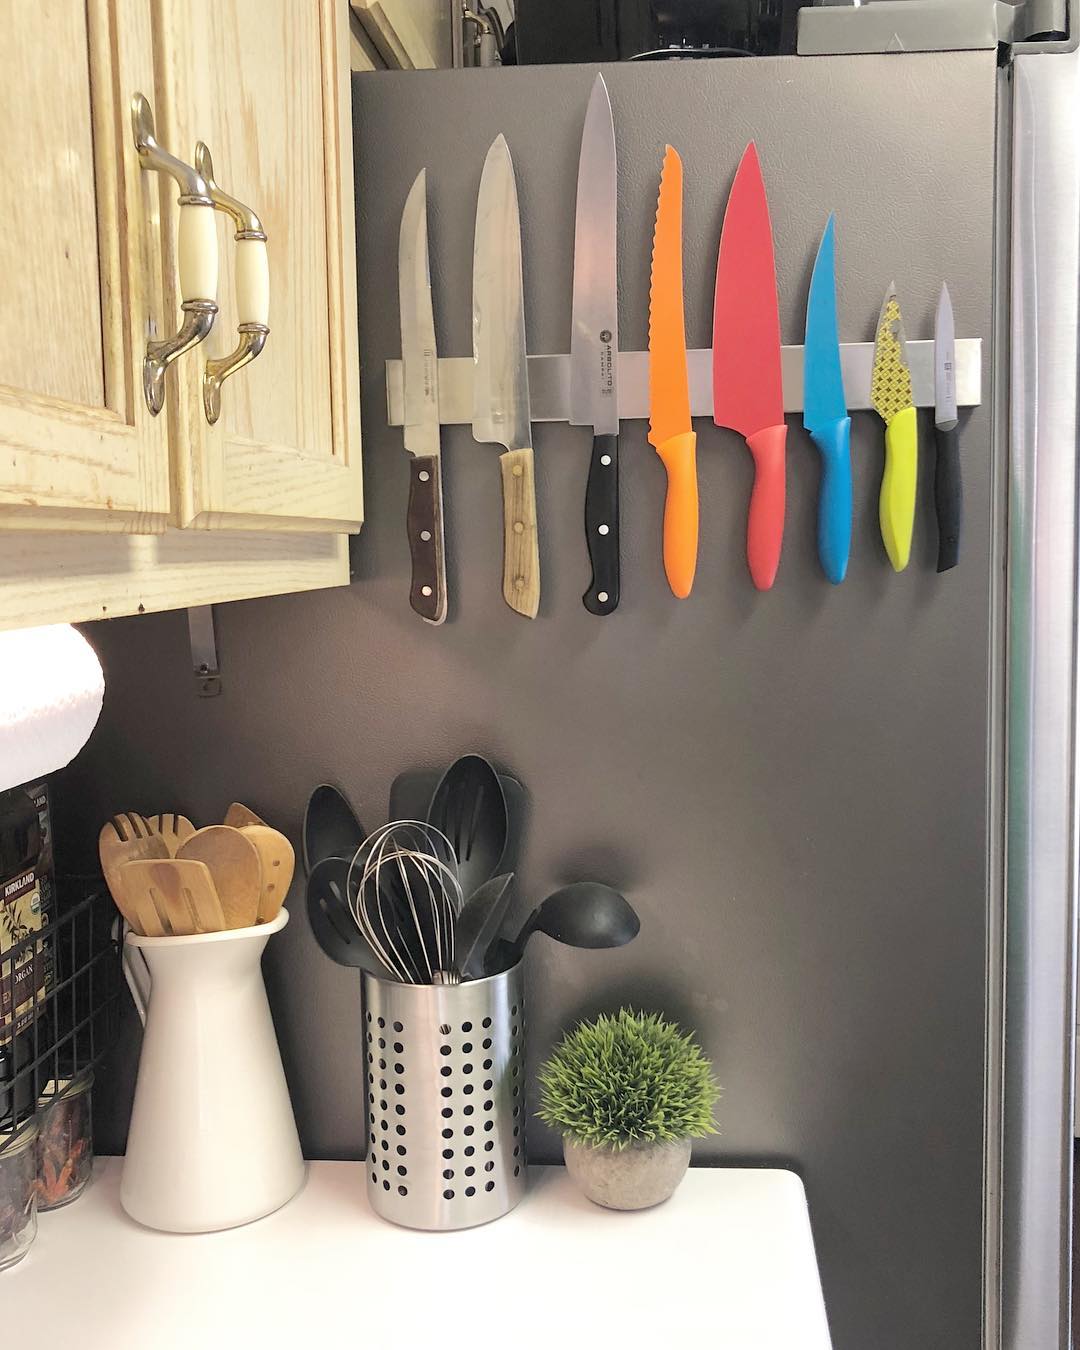
I ditched my knife block for a sleek magnetic strip for about $50, and it instantly freed up counter space while keeping my knives accessible and visible.
Why it works: Magnetic strips protect your blades and are hygienic.
Food & Wine advises that improper storage (like loose drawers) dulls the edge—and confirms that magnetic strips are a space-saving, safe upgrade.
How to DIY:
- Pick a spot near prep work, away from heat.
- Use strong anchors or mount into studs.
- Align knives neatly for easy reach and safety.
Pro tip: Opt for wooden-backed strips—they’re gentler on blades and look warm and stylish on your wall.
29. Add Cabinet Liner – $10-$50

I lined my cabinets with peel-and-stick liners (about $40 total), and suddenly opening the doors felt brighter and more polished.
Why it works: Shelf liners protect surfaces and keep things cleaner. A Redditor added that liners make cabinets feel cleaner and more hygienic—even in homes with little critters.
How to DIY:
- Remove contents and clean surfaces.
- Measure and cut liner to fit.
- Peel and apply, smoothing out bubbles.
- Style with organizers or dividers.
Pro tip: Choose water-resistant vinyl in light patterns for both function and a cheerful surprise.
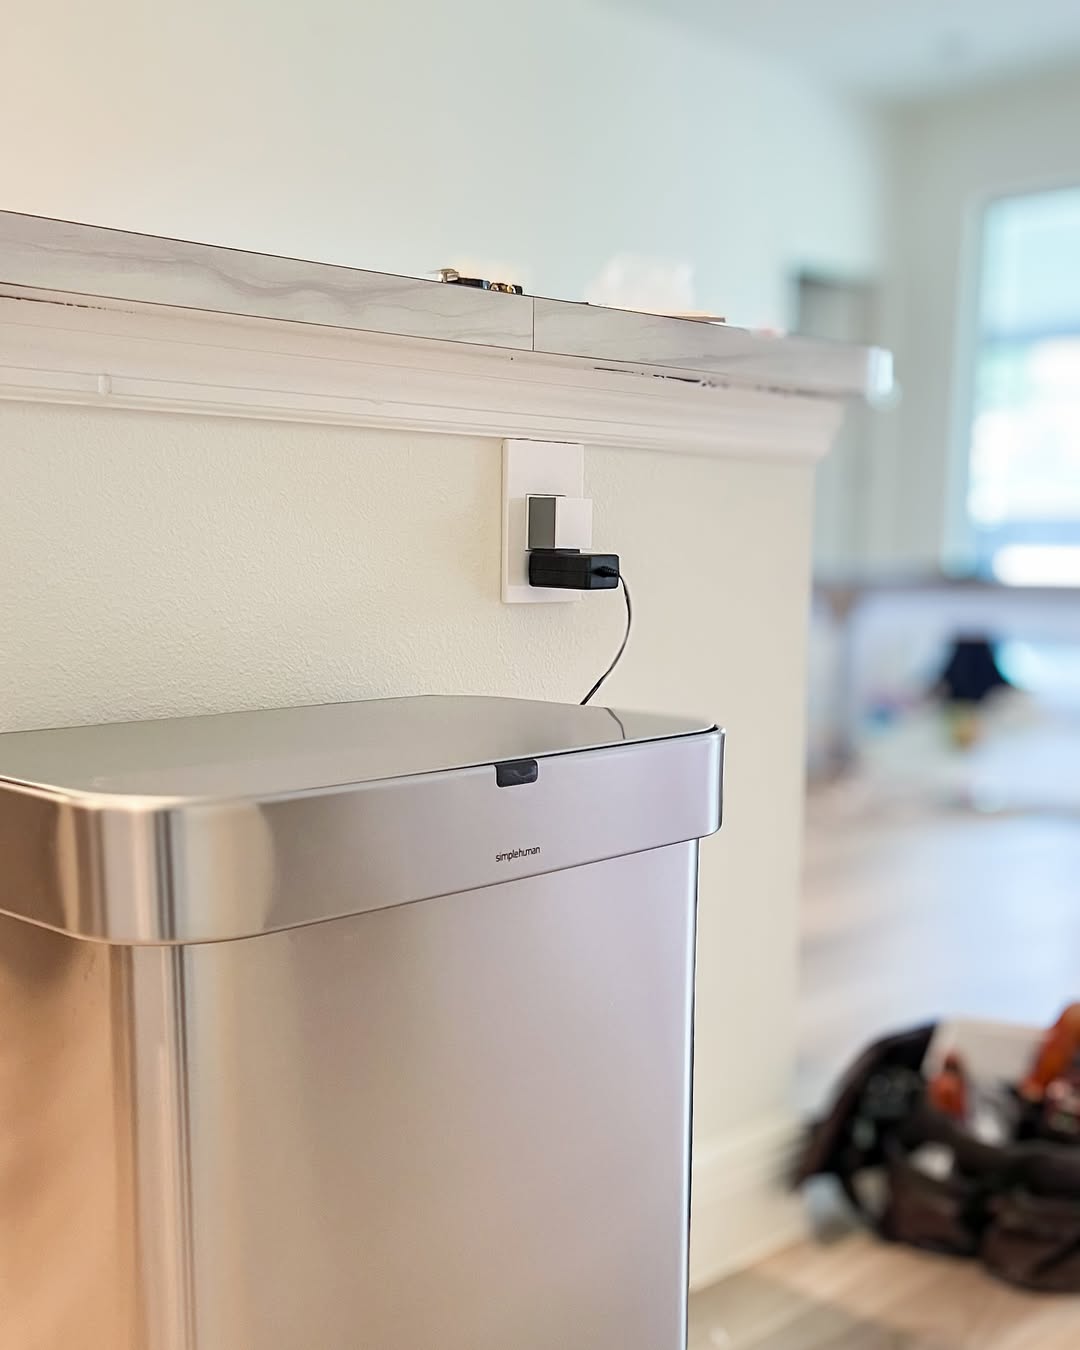
30. Add a Portable Dishwasher – $400-$700
I bought a countertop portable dishwasher for $499, hooked it to my sink, and saved hours in hand-washing every week.
Why it works: Portable dishwashers offer nearly the same efficiency as built-in models—with flexibility. KitchPulse reports portable models typically range $400–$700.
How to DIY:
- Place near your sink.
- Attach with a quick-release adapter.
- Run cycles, then tuck it away when not in use.
Pro tip: Opt for ENERGY STAR models—they often use less water than hand-washing—and save both time and utility bills.
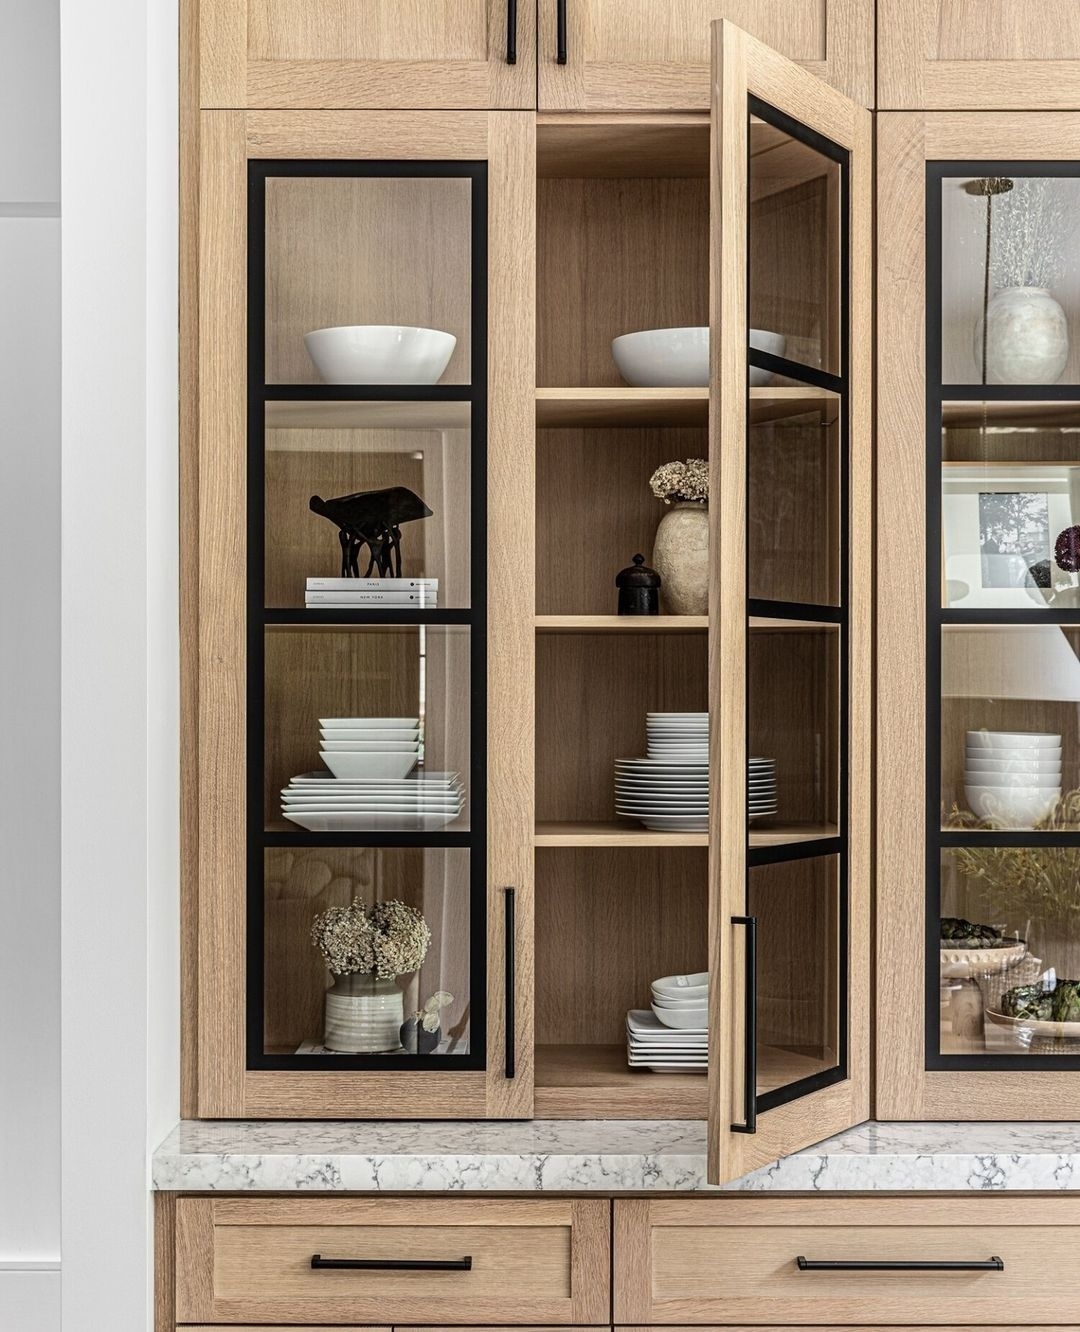
31. Upgrade Cabinet Glass Inserts – $50-$150 per Linear Foot
Swapping solid cabinet doors for glass inserts transformed my kitchen. Adding a few frosted glass panels cost right around $300, and suddenly, my dishes felt showcased, not hidden.
Why it works: According to a 2025 guide from Artline Kitchen & Bath, installing glass cabinet door inserts typically runs $50–$150 per linear foot, and is notably more affordable than full cabinet replacement—often 50–70% less expensive
How to DIY or Trim Pro Costs:
- Pick framed doors or insert kits compatible with your existing cabinetry.
- Choose between clear, frosted, or textured glass to match your vibe.
- For DIY, carefully replace panels; otherwise hire out by the linear foot.
Pro tip: Use frosted or seeded glass to disguise a messy shelf and still enjoy that open, inviting feel.
32. Install Crown Molding – $4–$23 per Linear Foot
Crown molding turned my kitchen ceiling into something you’d spot in boutique restaurants. At about $15 per linear foot, I added class and height perception without a full crown rewrite.
Why it works: Installing crown molding costs $4–$23 per linear foot, depending on material and complexity, making it a high-impact yet budget-conscious upgrade.
DIY Steps:
- Measure the room’s perimeter accurately.
- Choose flexible polyurethane or traditional MDF for easier installation.
- Miter corners precisely and fill seams with caulk.
- Paint to match or accent your trim.
Pro tip: For a unified look, install molding atop upper cabinets and across ceilings to blend with your architectural style.
33. Paint Appliances – $50-$150
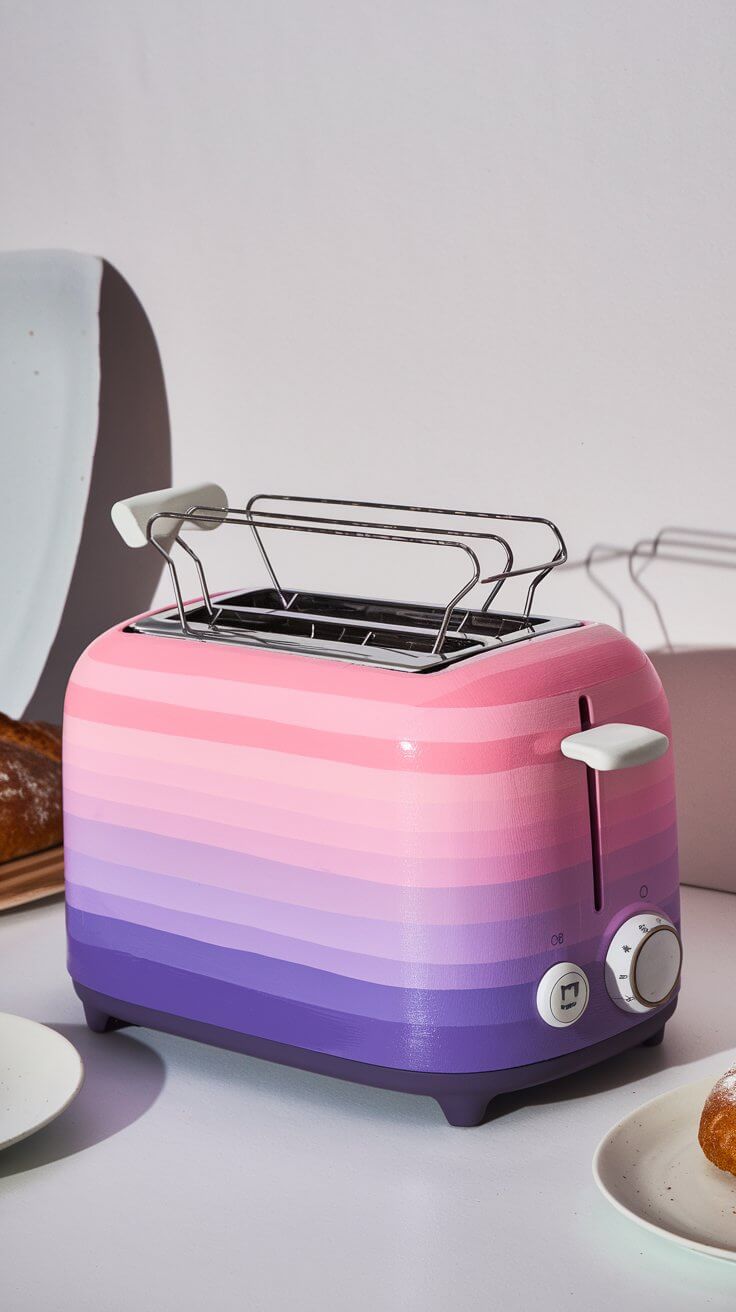
My old fridge was good, but the color was tarnished. I used a $35 appliance paint kit—and had a fresh, stainless finish that cost far less than a new unit.
Why it works: Home Depot lists appliance paint from $10 to $100, though most kits are $25–$40—an affordable way to revive a dated model without replacing it.
DIY Approach:
- Lightly sand and clean surfaces.
- Apply 2–3 light coats of appliance enamel spray or brush-on epoxy.
- Allow proper curing time before use.
Pro tip: Choose appliance-specific enamel paint—it resists heat, moisture, and fingerprints better than regular paint.
34. Create a Functional Pantry Area – $250–$1,500 for DIY
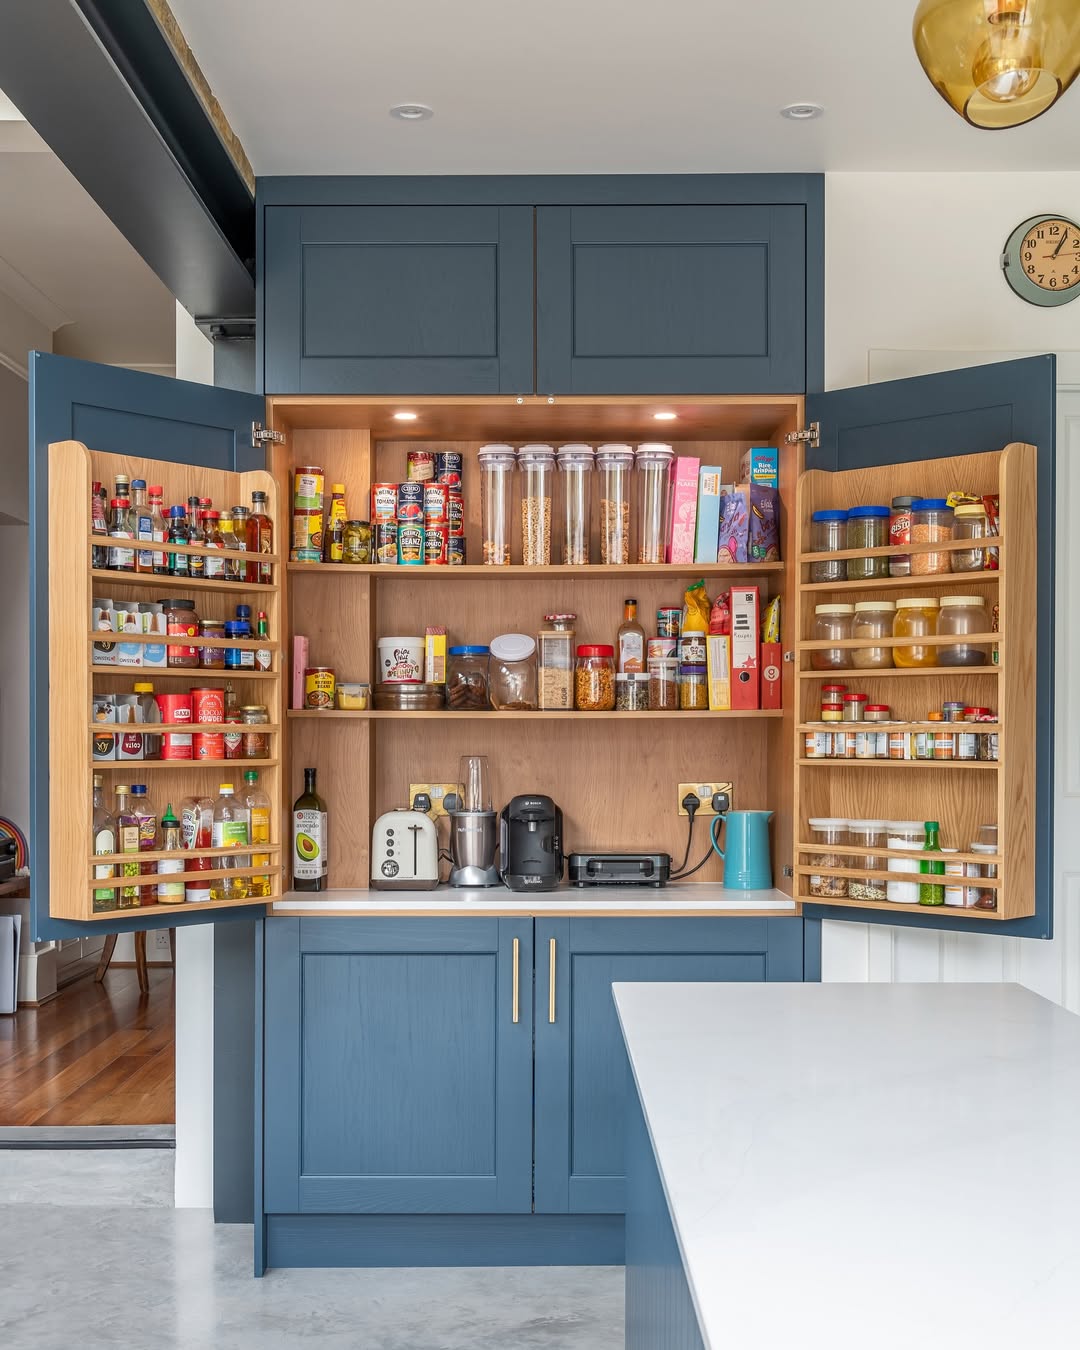
I converted a messy corner into a mini pantry with adjusted shelving and labeled bins—DIY cost: ~$400, and clutter vanished overnight.
Why it works: Custom reach-in pantries cost between $250–$1,500, depending on setup and materials.
How to make it happen:
- Choose your pantry style: open shelves, cabinets, or bins.
- Use vertical space—stackable containers and adjustable shelves maximize storage.
- Illuminate wisely—add LED strips or puck lights for visibility.
Pro tip: Use clear, uniform containers for dry goods and label everything—looks curated and cuts chaos.
35. Install a Small Breakfast Nook – $150-$400
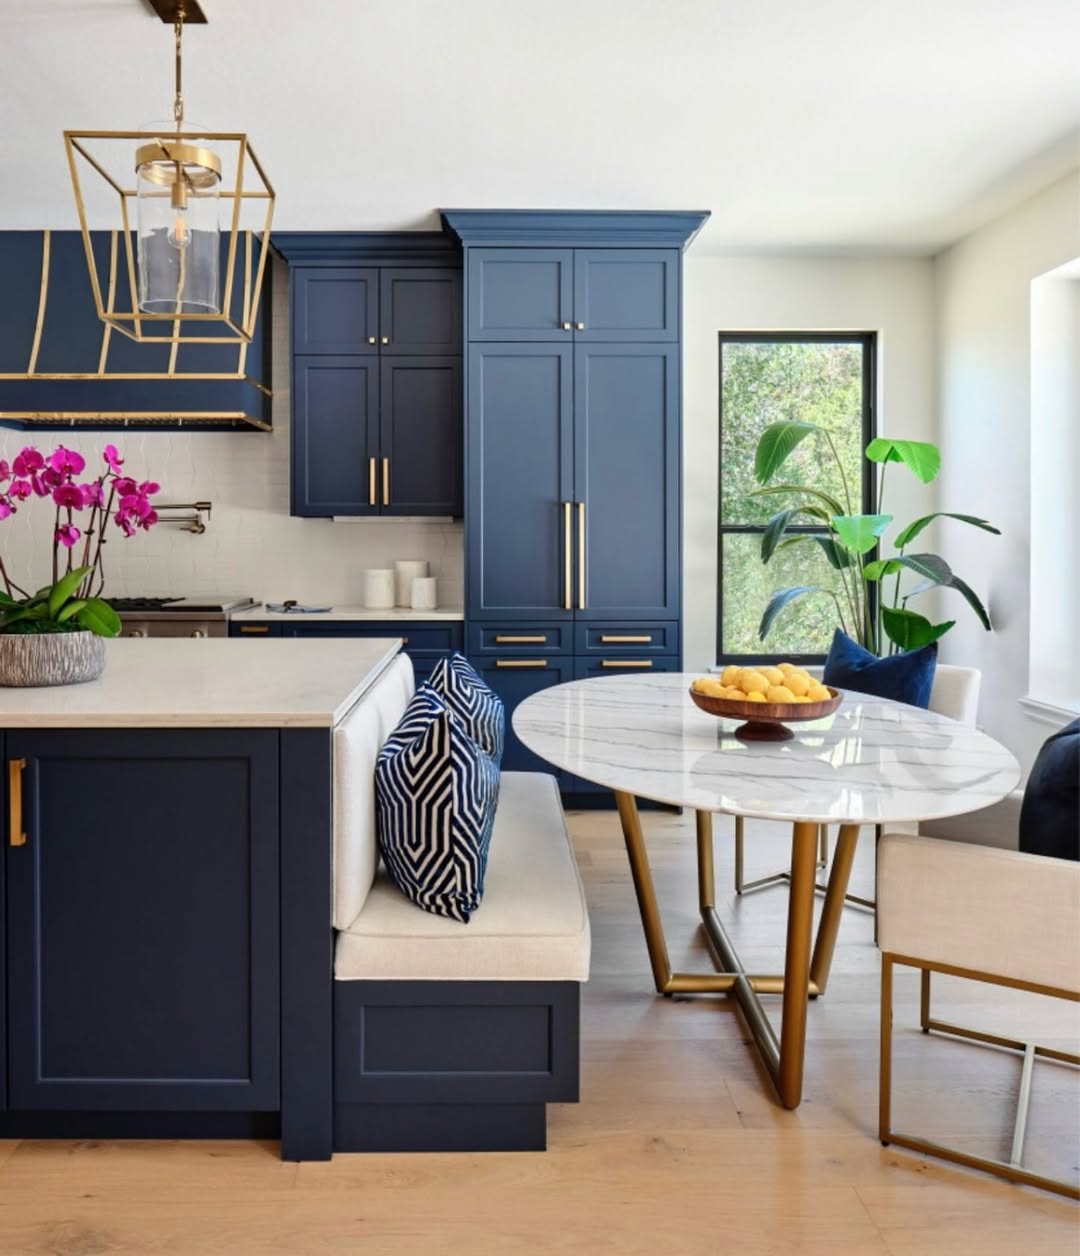
Even with a tiny kitchen, I tucked a 3-piece nook set into a corner for about $180, instantly creating a spot for morning tea or meal prep.
Why it works: Compact breakfast nook sets are plentiful, with many priced under $500, especially in value lines from big retailers like Home Depot, Wayfair, or Bed Bath & Beyond
How to Build Your Nook:
- Measure your space to confirm clearance and comfort.
- Choose space-saving designs—bench seating or drop-leaf tables work well.
- Add cushions or serving trays to make it functional and stylish.
Pro tip: Use a bench with hidden storage to keep linens, magazines, or snacks right at hand.
FAQs, Stunning Small Kitchen Makeovers under $1000
What is the cheapest way to update a small kitchen?
Cosmetic upgrades are by far the least expensive and can include painting your walls or cabinets, replacing cabinet hardware or attaching peel-and-stick backsplash. All of them can be accomplished at less than 200 dollars and provide a dramatic visual lift.
Which DIY kitchen upgrade adds the most resale value?
When you consider resale, cabinets, refreshes, and countertops should be prioritized. Re-painting or replacing cabinet doors will provide immediate appeal to the buyer, and the resurfacing of laminated countertops will look like stone at a cheaper price.
How much should I budget for a kitchen refresh in 2025?
A simple do-it-yourself upgrade can begin as cheaply as $500 and change to $1,000, and a professional mid-range upgrade can go to the 5,000 to 10,000 range. The good news? You can revamp a small kitchen with smart swaps- paint, lighting, storage, and put it together in well under 1000 dollars as illustrated in this guide.
Conclusion: 35 Stunning Small Kitchen Makeovers Under $1000
Makeover of a small kitchen on a limited budget is not only possible, but also a fun, creative process that will reward functionality and happiness.
These 35 makeover ideas show that you do not have to have a huge budget or an unlimited amount of square footage to make a space that will feel modern, welcoming, and uniquely yours.
Whether it comes as an easy paint update or the introduction of a smart storage solution or even driving in a portable dishwasher, each project gets the ball rolling toward a kitchen that is a reflection of your personality and lifestyle.
Most of these upgrades can be completed over a weekend, and nearly all result in an impact that is larger than the investment.
In fact, studies show that even small kitchen improvements can add measurable value to your home while enhancing everyday satisfaction in one of the most-used rooms in the house.
The takeaway? You do not need a huge kitchen to experience something amazing. It is possible to turn your space into a place where you want to cook, a place where you want to spend time with your family, and a place where everything is as per your taste, with carefully thought choices and a touch of DIY spirit.
Then shake off the dust, grab an idea, and begin this weekend and see how even the tiniest bit of change will make your kitchen–and your everyday routine–brighten.
And if you liked this idea do check out upcoming 2026 trends for kitchen. These are sure to come in handy during your kitchen upgrade.
Also, we would love to know your thoughts. Which one of these upgrades will you make?
Please comment below and let us know. We would love to know your opinions.


